Visualizing complex concepts for kids shouldn't require a degree in instructional design or animation.
But that's the problem most educators face. You know photosynthesis makes sense with the right visuals. You can imagine how fractions would click if kids could see the pieces fitting together. The challenge isn't the concept it's getting it from your head onto the screen in a way that actually works.
This guide shows you how to write scripts that automatically generate visual explanations kids understand without drawing a single frame yourself.
Create Your Visualisation Now!
Why Complex Concepts Need Visual Storytelling
Abstract ideas live in adult brains comfortably. For kids, they don't exist until you make them concrete.
Consider teaching "evaporation":
Text explanation: "Water molecules gain energy and transform from liquid to gas."
Visual explanation: Water droplets rising into the air, becoming invisible vapor clouds.
The second version doesn't just explain better it creates a mental image kids can retrieve later.
Research from the Learning Sciences Institute shows children retain visual explanations 3x better than text-only instruction. But here's the catch: the visuals need to be clear, sequential, and directly tied to the concept not decorative.
That's where most educational content fails. Either the visuals are too generic (random clip art), too complex (overwhelming diagrams), or too expensive to produce consistently.
Breaking Down Complex Concepts: The Framework
Before you write a single line of script, you need a concept breakdown framework.
Step 1: Identify the Core Idea
What's the one thing you need kids to walk away understanding?
Example - Photosynthesis: Core idea: "Plants make their own food using sunlight, water, and air."
Everything else chlorophyll, glucose, oxygen output is supporting detail. Start with the core.
Step 2: Find the Visual Metaphor
Abstract concepts need concrete comparisons kids already understand.
Photosynthesis → Cooking in a kitchen
Sunlight = heat source
Water + CO2 = ingredients
Glucose = finished meal
Chloroplasts = the kitchen
Gravity → Invisible rope pulling things down
Multiplication → Groups of the same thing
The metaphor gives kids a mental scaffold to hang new information on.
Create Your Visualisation Now!
Step 3: Break Into Sequential Steps
Complex concepts are really just simple steps in order.
Water cycle broken down:
Sun heats water (evaporation)
Vapor rises and cools (condensation)
Droplets gather in clouds
Heavy clouds release rain (precipitation)
Water returns to lakes and oceans
Each step gets one scene. One visual moment. One piece of understanding.
Step 4: Add Character Interaction
Characters don't just narrate they discover the concept with the viewer.
Instead of: "Plants use sunlight to make food."
Use:
Luna: "Professor Pixel, how do plants eat if they don't have mouths?"
Professor Pixel: "Great question! Watch what happens when sunlight hits these leaves..."
Characters make abstract concepts feel like a story kids can follow.
Writing Scripts That Generate Clear Visuals
Here's how to write for automatic visual generation, where your script descriptions become actual scenes.
Use Concrete Scene Descriptions
Atlabs generates visuals based on what you write. Be specific.
Vague: [A scene about gravity]
Clear: [Luna drops a ball and an apple. Both fall at the same speed toward the ground.]
Vague: [Show photosynthesis happening]
Clear: [Inside a leaf. Sunlight beams hit green chloroplasts. Water droplets and CO2 bubbles flow in. Sugar molecules form and glow.]
The more specific your scene description, the more accurate the visual generation.
Create Your Visualisation Now!
Script Multi-Step Processes Across Scenes
Don't try to show everything in one scene. Break processes into a sequence.
Water Cycle Script Example:
[Scene 1: Ocean with sun shining]
Narrator: "Our story begins in the ocean, where the sun's warmth starts something amazing."
[Scene 2: Close-up of water droplets rising as vapor]
Luna: "Look! The water is disappearing!"
Professor Pixel: "Not disappearing—transforming into invisible vapor."
[Scene 3: Sky with vapor cooling into cloud droplets]
Narrator: "As vapor rises, it cools and becomes tiny water droplets again."
[Scene 4: Dark clouds heavy with water]
Luna: "The clouds look really full!"
[Scene 5: Rain falling back to the ocean]
Professor Pixel: "And now the water returns home as rain. The cycle starts all over!"
Each scene = one step. One visual moment. Easy to follow.
Use Character Actions to Demonstrate Concepts
Instead of telling, show characters doing things that reveal the concept.
Teaching fractions:
[Scene: Luna has a pizza]
Luna: "I have one whole pizza!"
[Scene: Luna cuts pizza into 4 equal slices]
Professor Pixel: "What if we cut it into four equal pieces?"
[Scene: Luna takes one slice]
Luna: "Now I have one piece out of four. One-fourth!"
[Scene: Calculus takes two slices]
Calculus: "I have two pieces out of four. Two-fourths!"
Professor Pixel: "Which is the same as one-half!"
The characters demonstrate fractions by physically manipulating objects. Kids see the concept in action.
Layer Complexity Gradually
Start simple. Add detail only after the foundation is clear.
Teaching the Solar System:
First pass: "Planets go around the sun."
Second pass: "Different planets take different amounts of time."
Third pass: "The farther away, the longer the orbit."
Script your scenes to build the same way. Simple visual → add one detail → add another.
Create Your Visualisation Now!
How Atlabs Turns Concept Scripts Into Visual Lessons
Here's where your concept breakdown and careful scripting pay off.
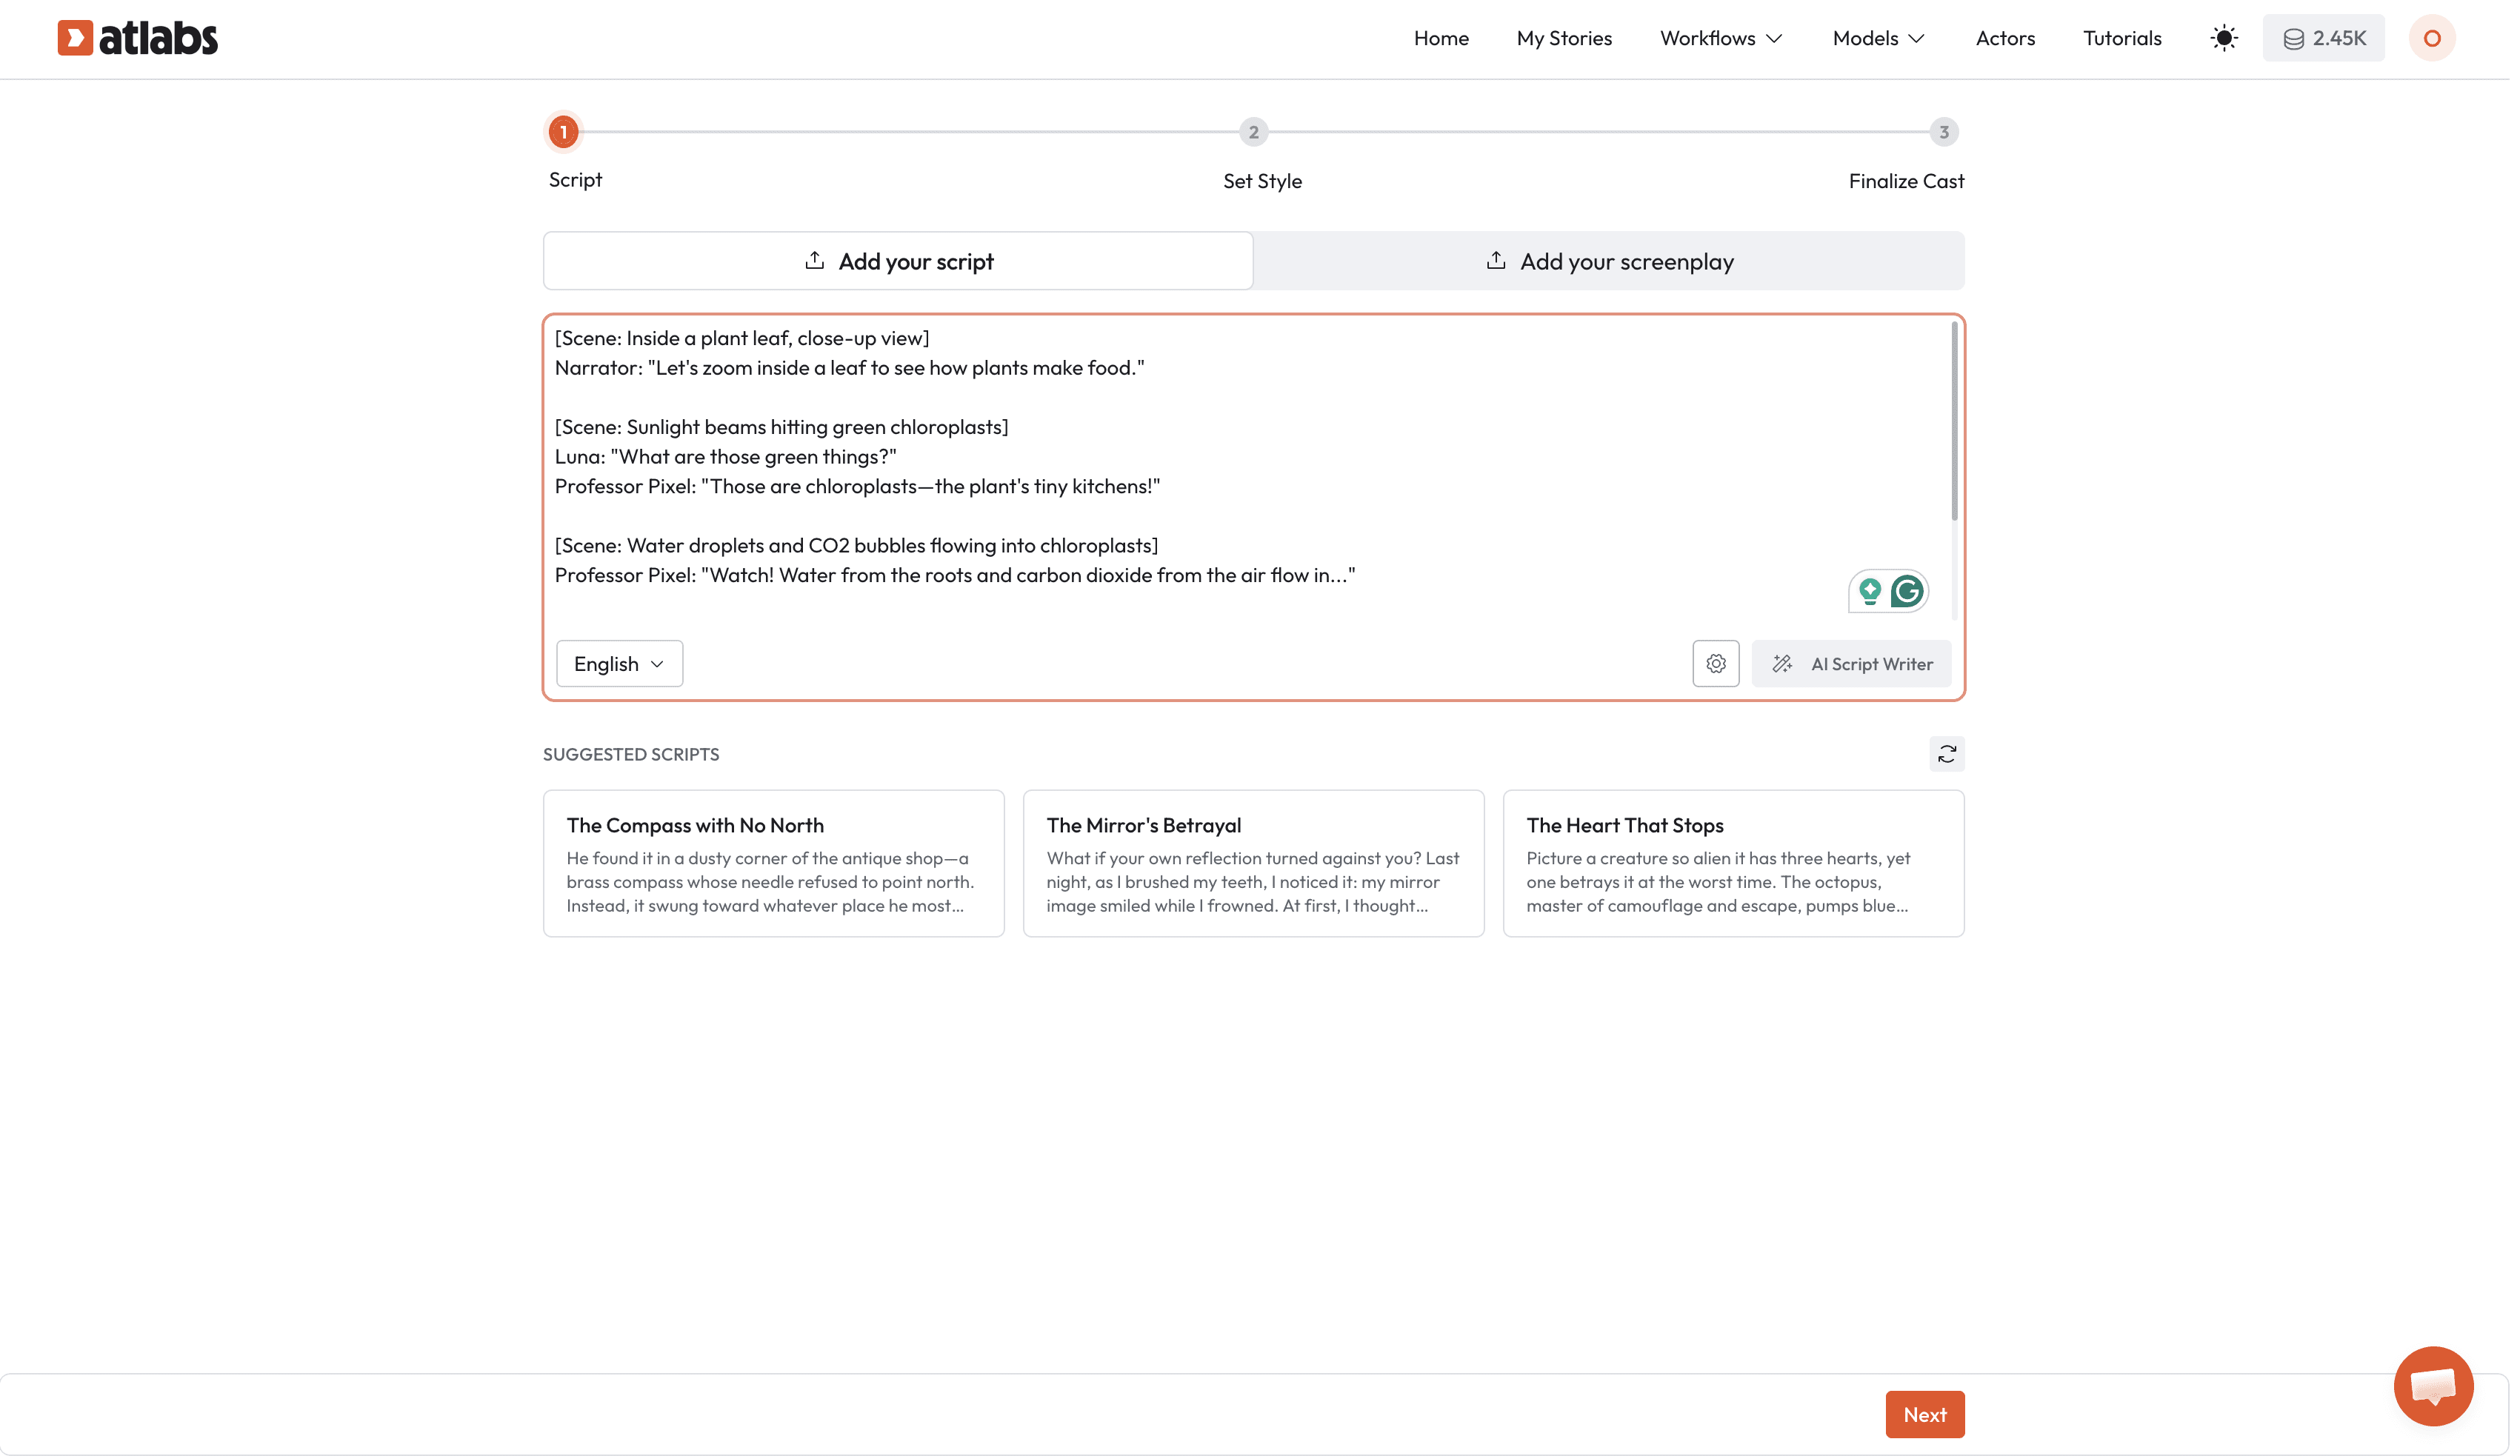
Step 1: Write Your Concept Script
Use the framework above to write your full script with clear scene descriptions and character actions.
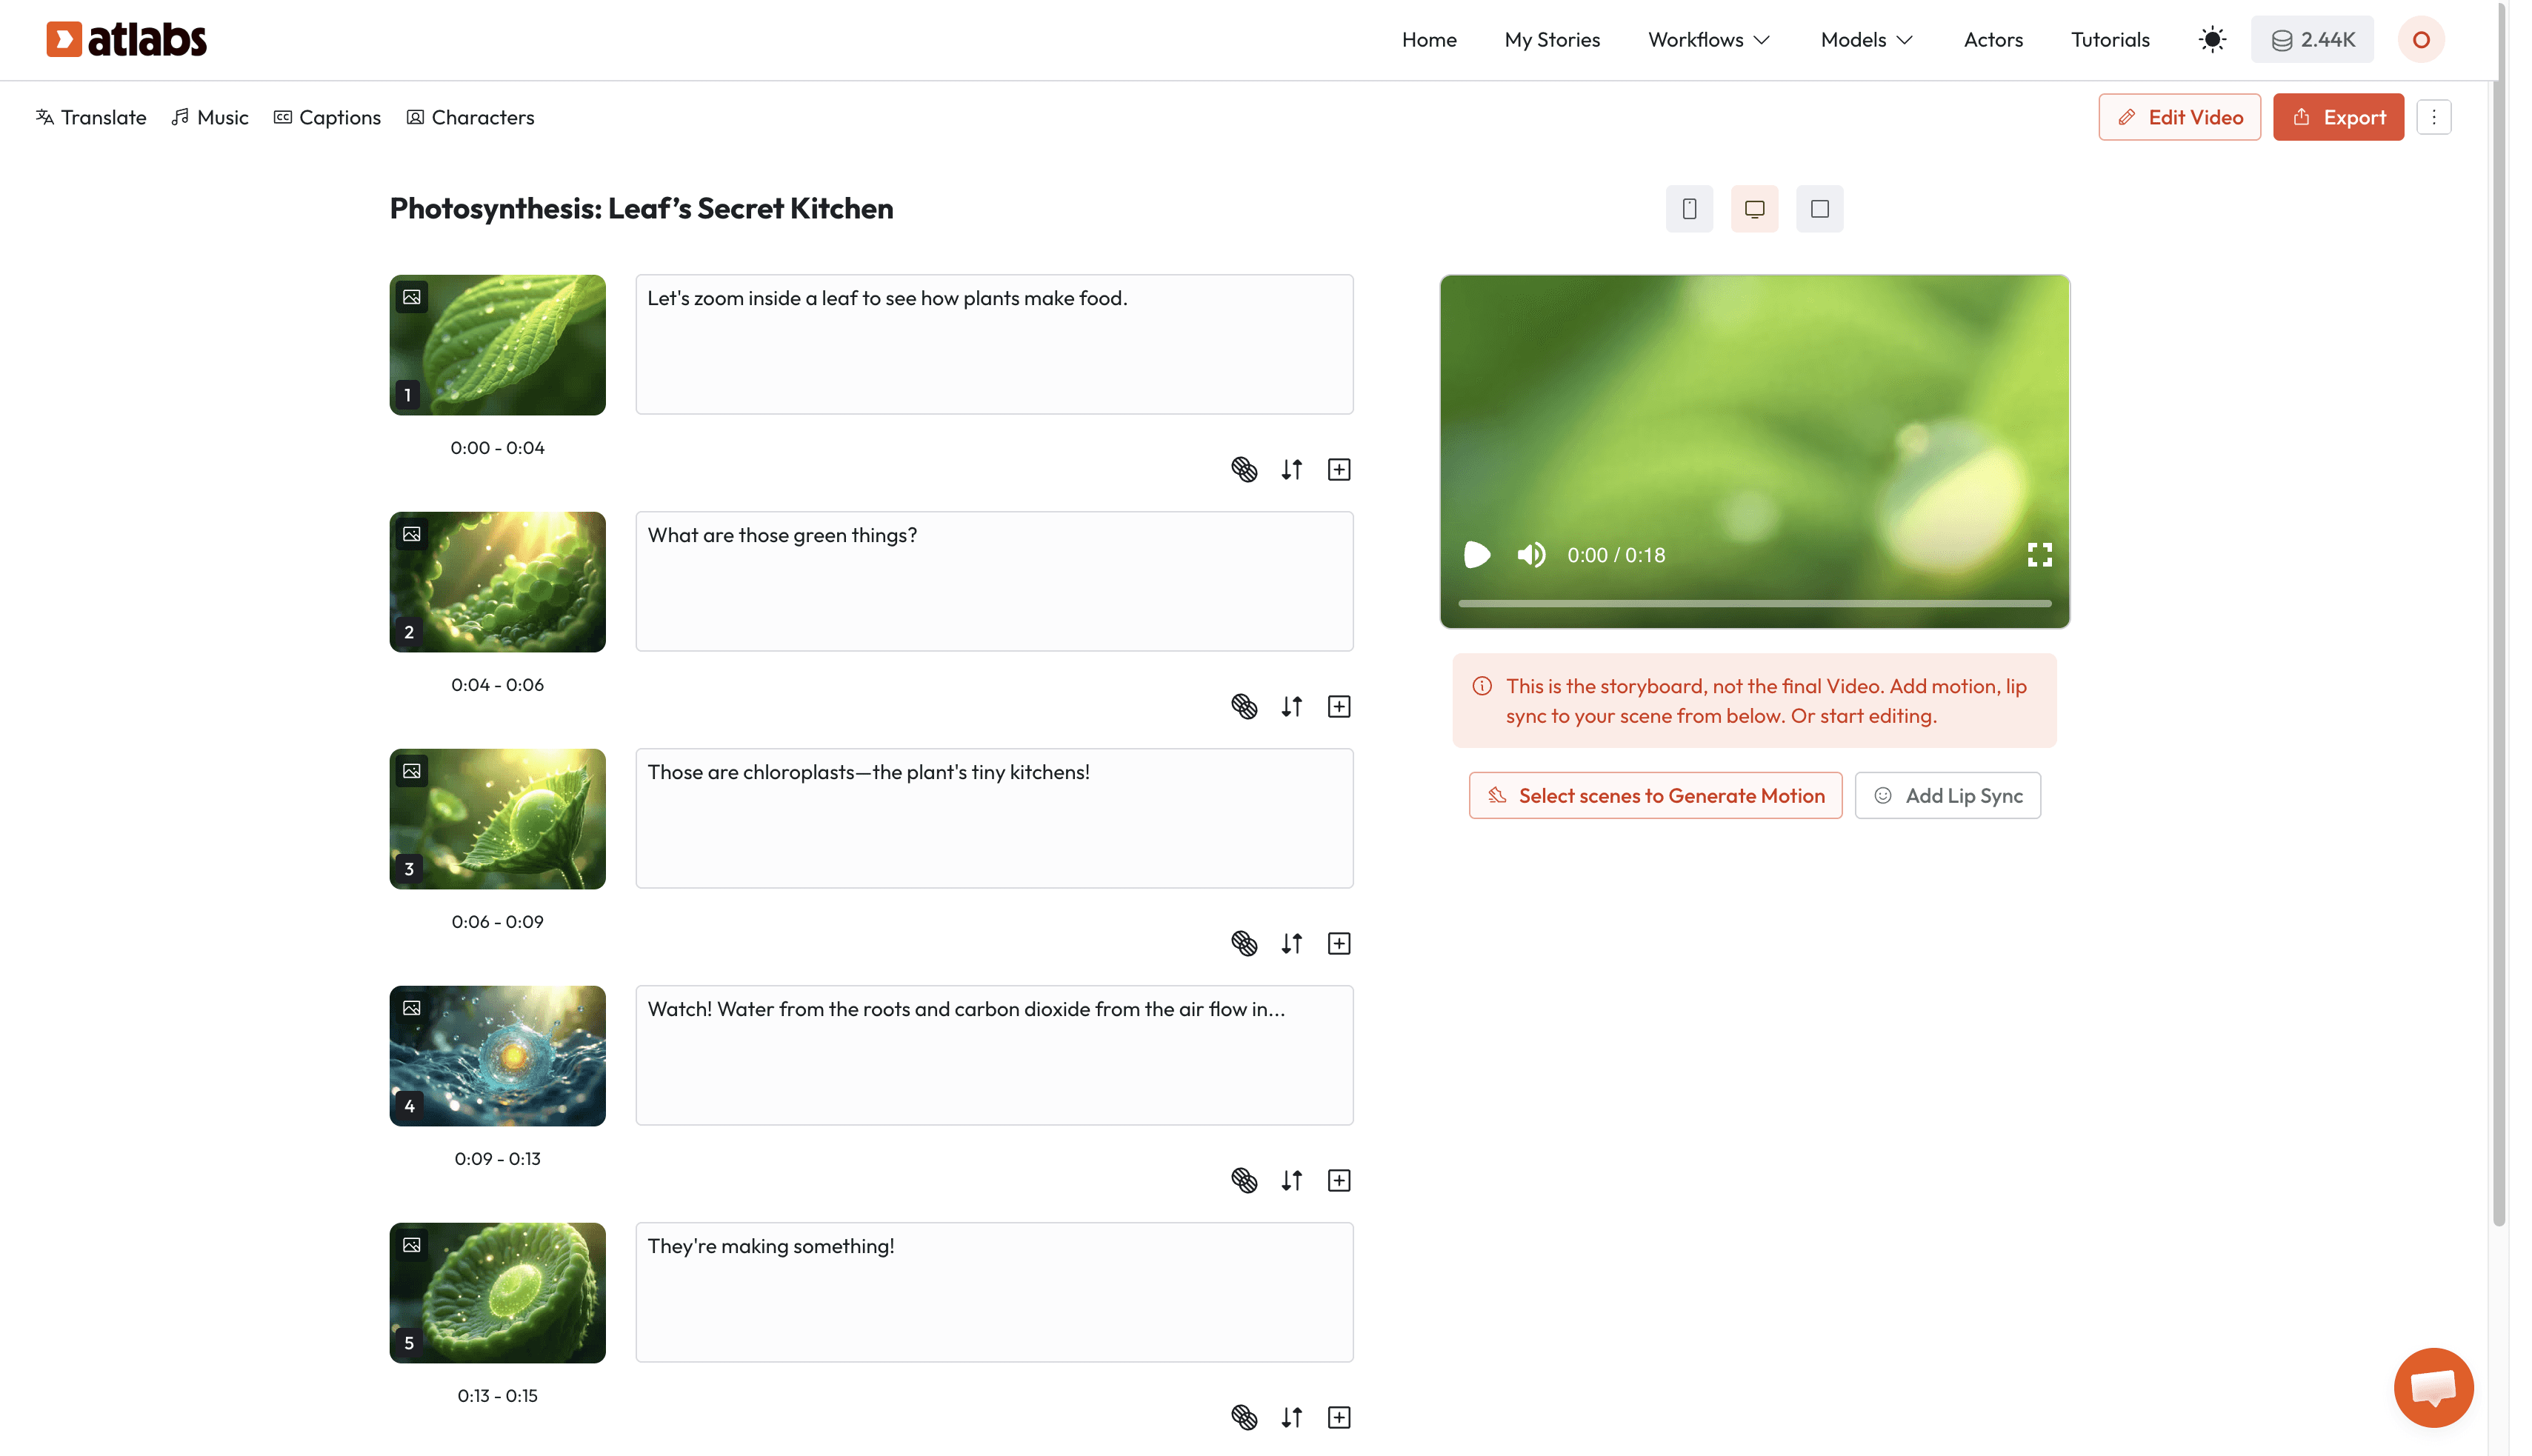
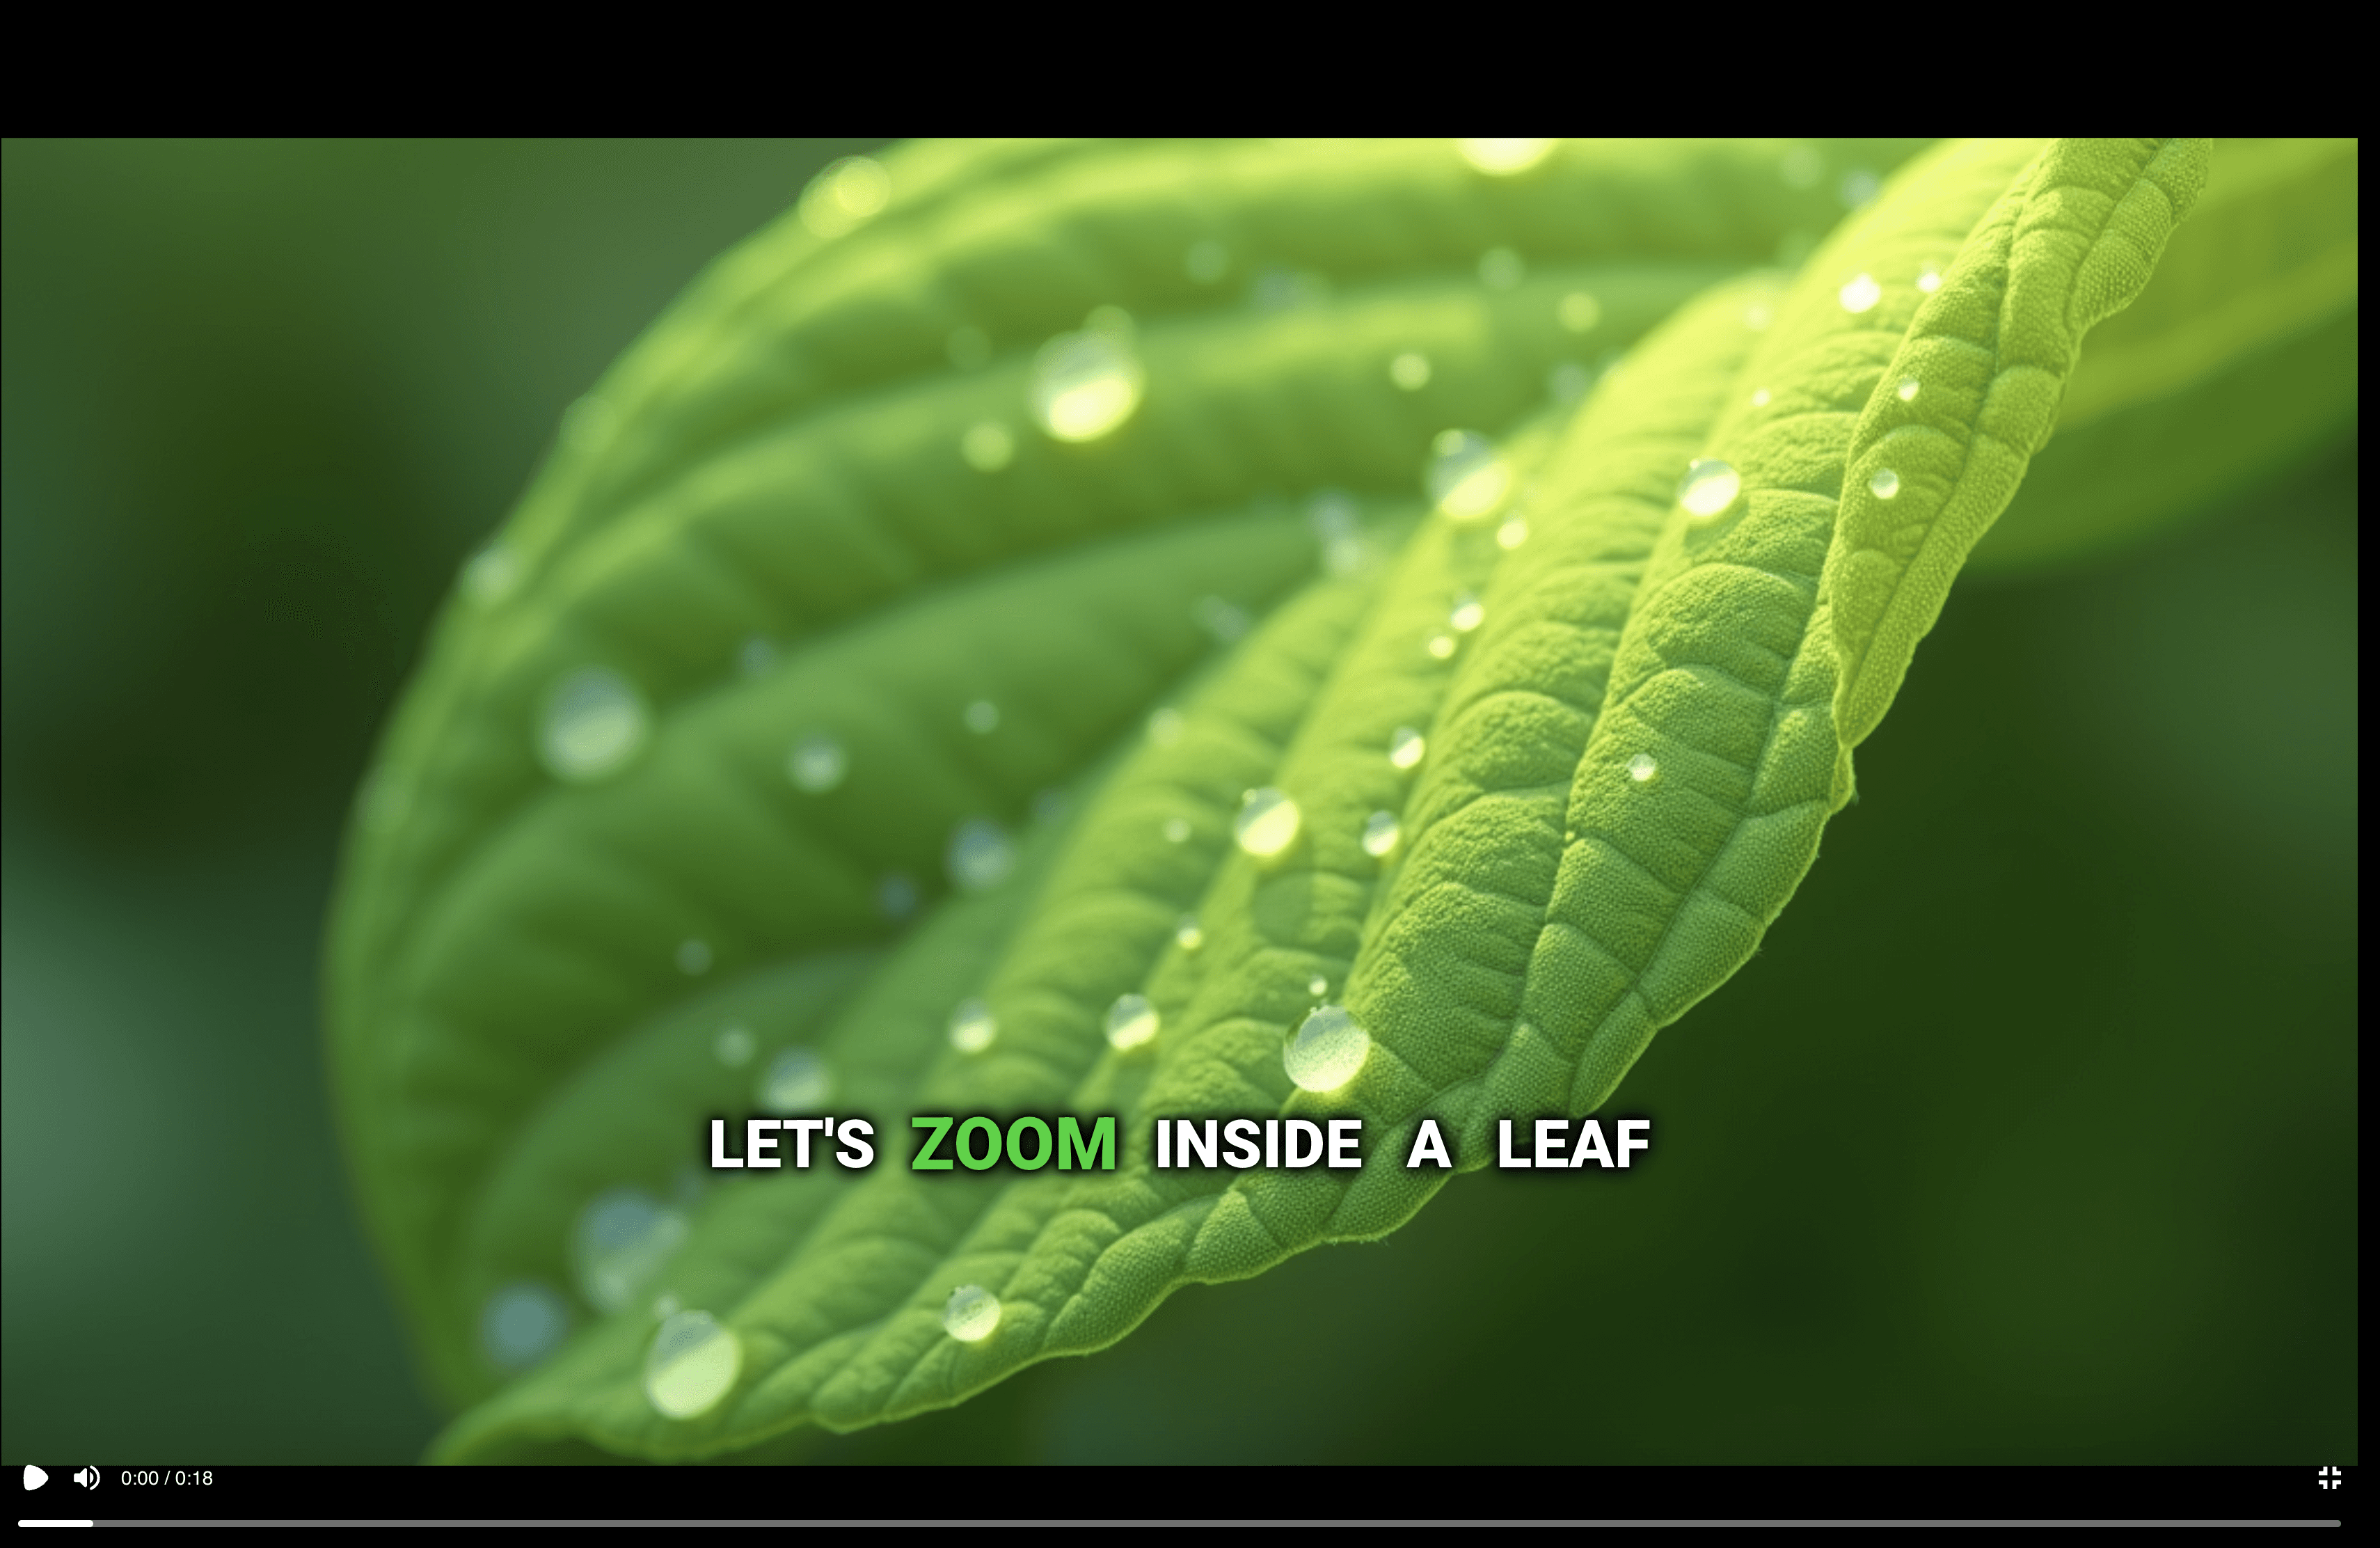
[Scene: Inside a plant leaf, close-up view]
Narrator: "Let's zoom inside a leaf to see how plants make food."
[Scene: Sunlight beams hitting green chloroplasts]
Luna: "What are those green things?"
Professor Pixel: "Those are chloroplasts—the plant's tiny kitchens!"
[Scene: Water droplets and CO2 bubbles flowing into chloroplasts]
Professor Pixel: "Watch! Water from the roots and carbon dioxide from the air flow in..."
[Scene: Chloroplasts glowing, sugar molecules forming]
Luna: "They're making something!"
Professor Pixel: "Yes! Sugar—the plant's food. That's photosynthesis!"
Try Atlabs Now!
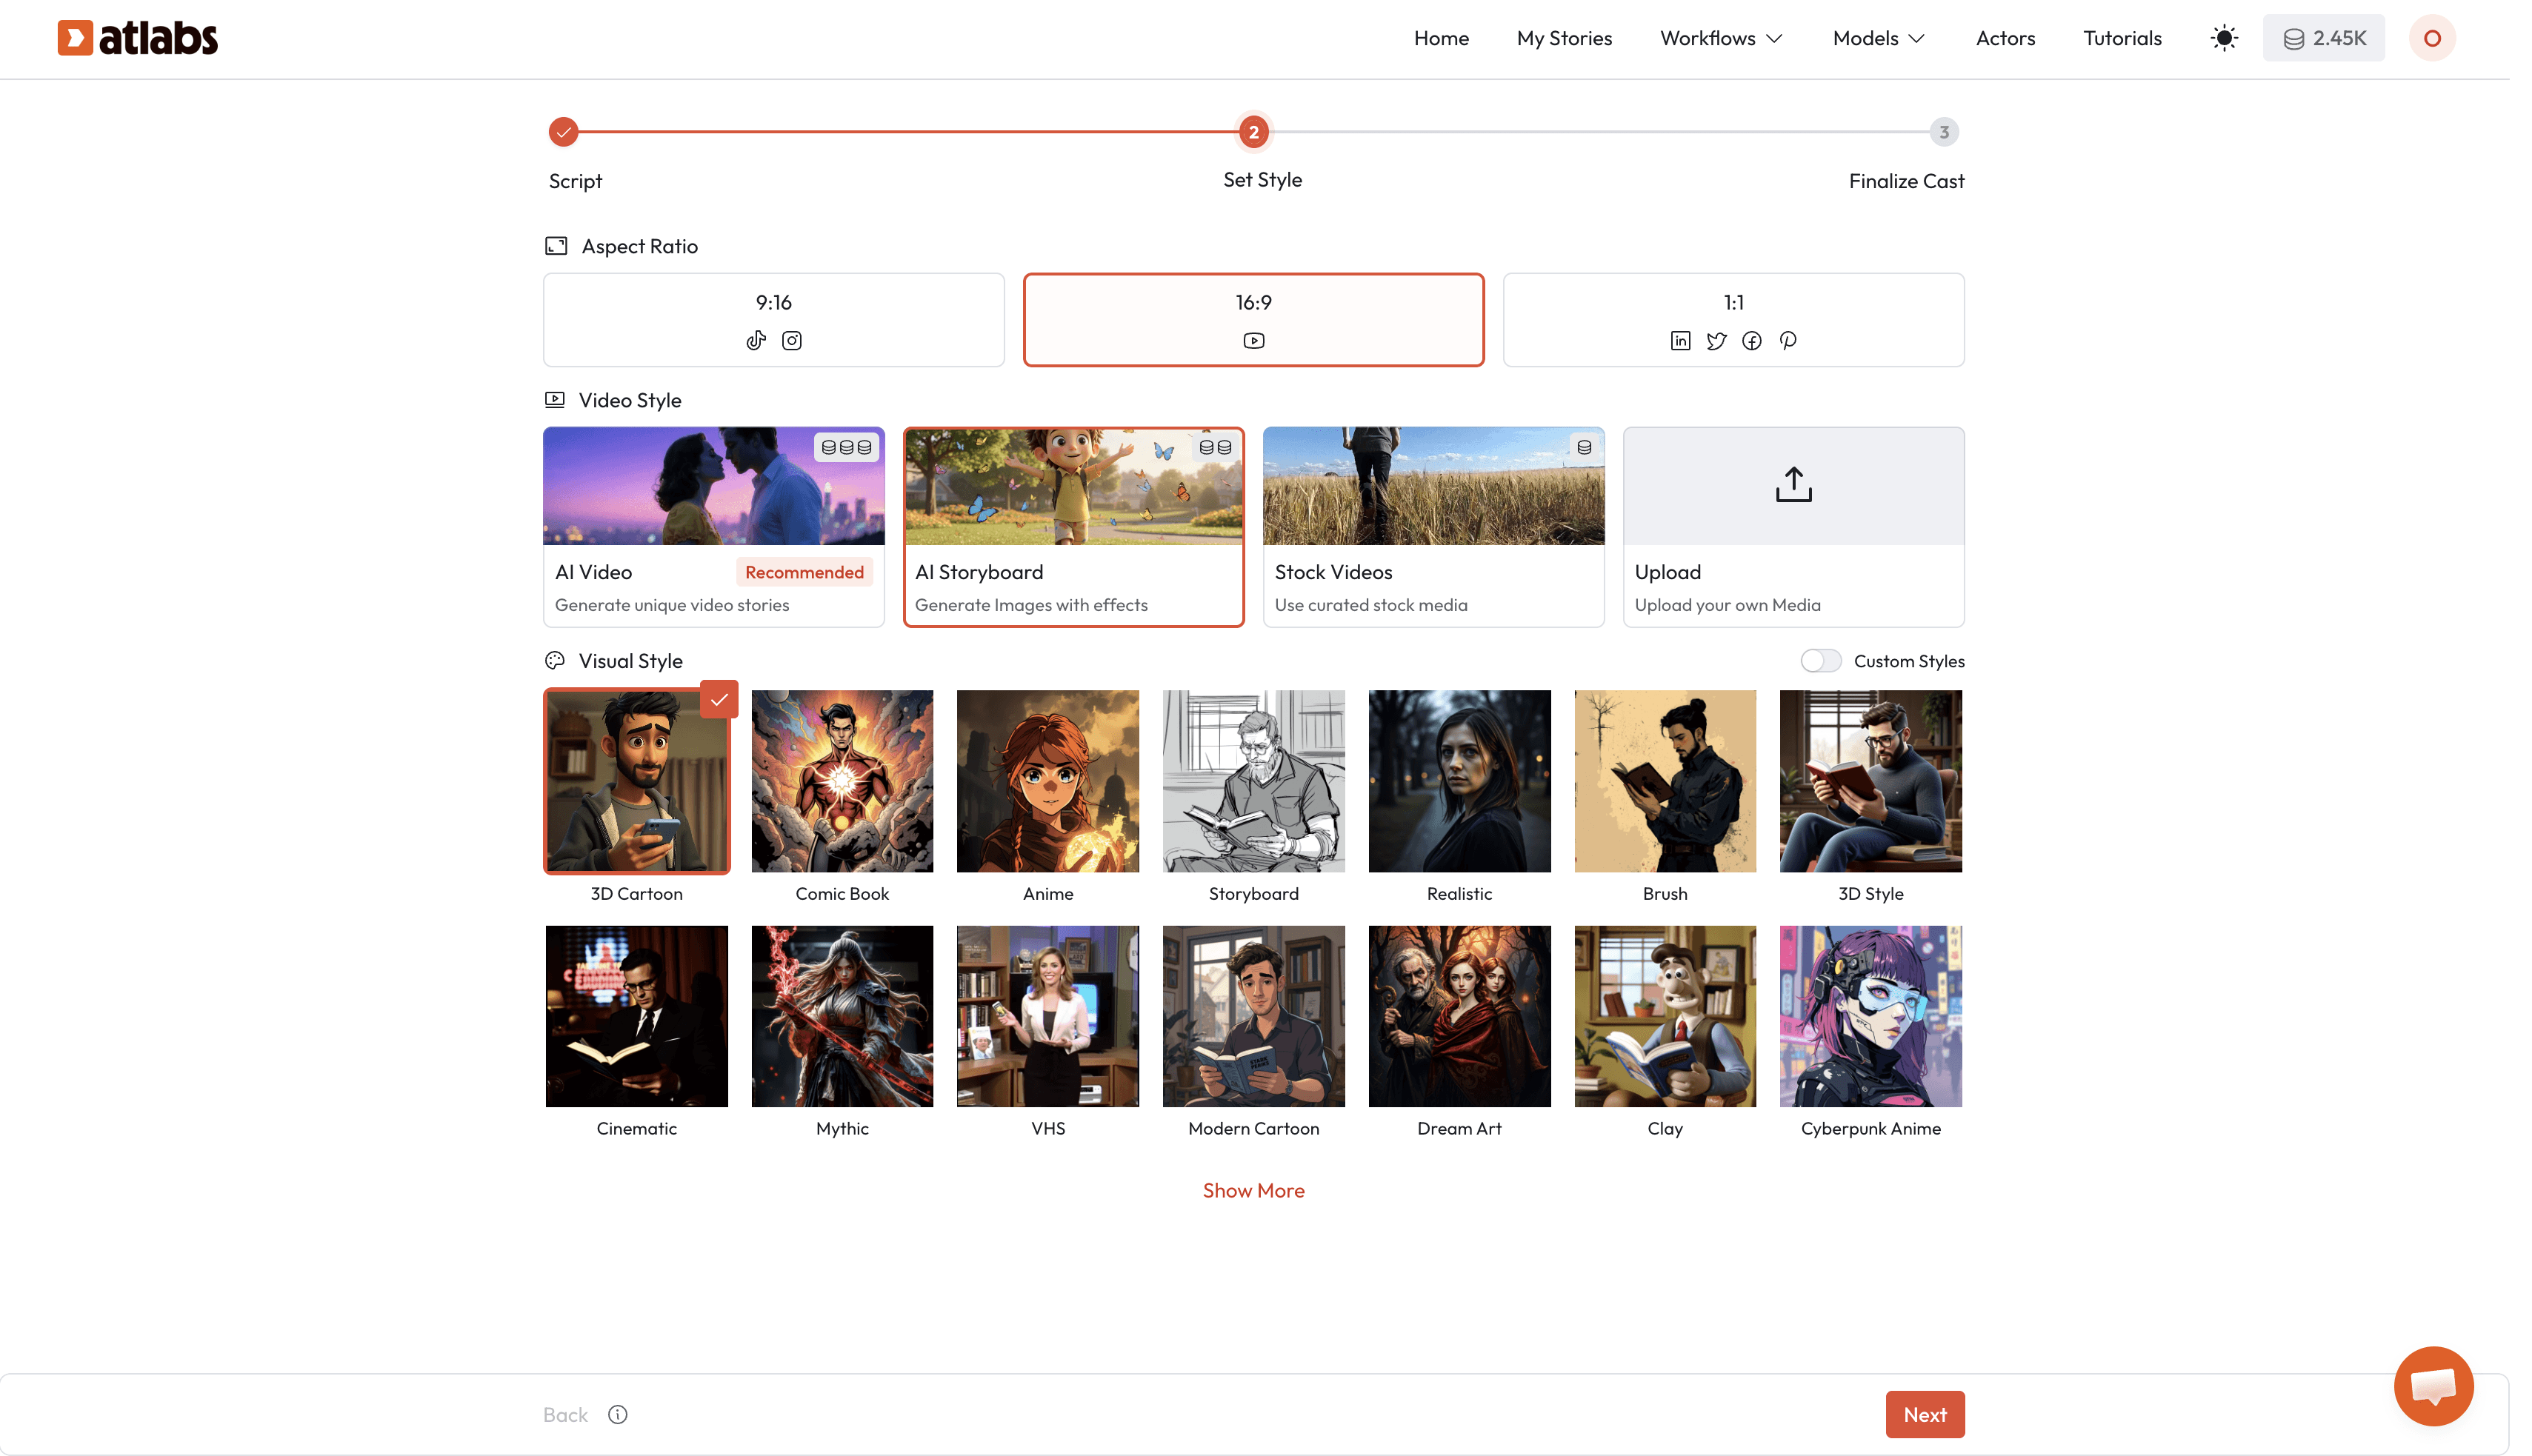
Step 2: Choose Storyboard Mode
When you start your video creation in Atlabs:
Select Cartoon Video workflow
In the style selection step, choose Storyboard instead of AI Video
Select your visual style (3D Cartoon, 2D Cartoon, etc.)
Choose aspect ratio (16:9 for classroom, 9:16 for social media)
What storyboard does: Generates a sequence of still images for each scene in your script, showing you exactly what the visual lesson will look like before adding motion.
Try Atlabs Now!
This is perfect for:
Reviewing concept visualization before final video
Getting approval from curriculum directors or collaborators
Testing if your scene descriptions are generating the right visuals
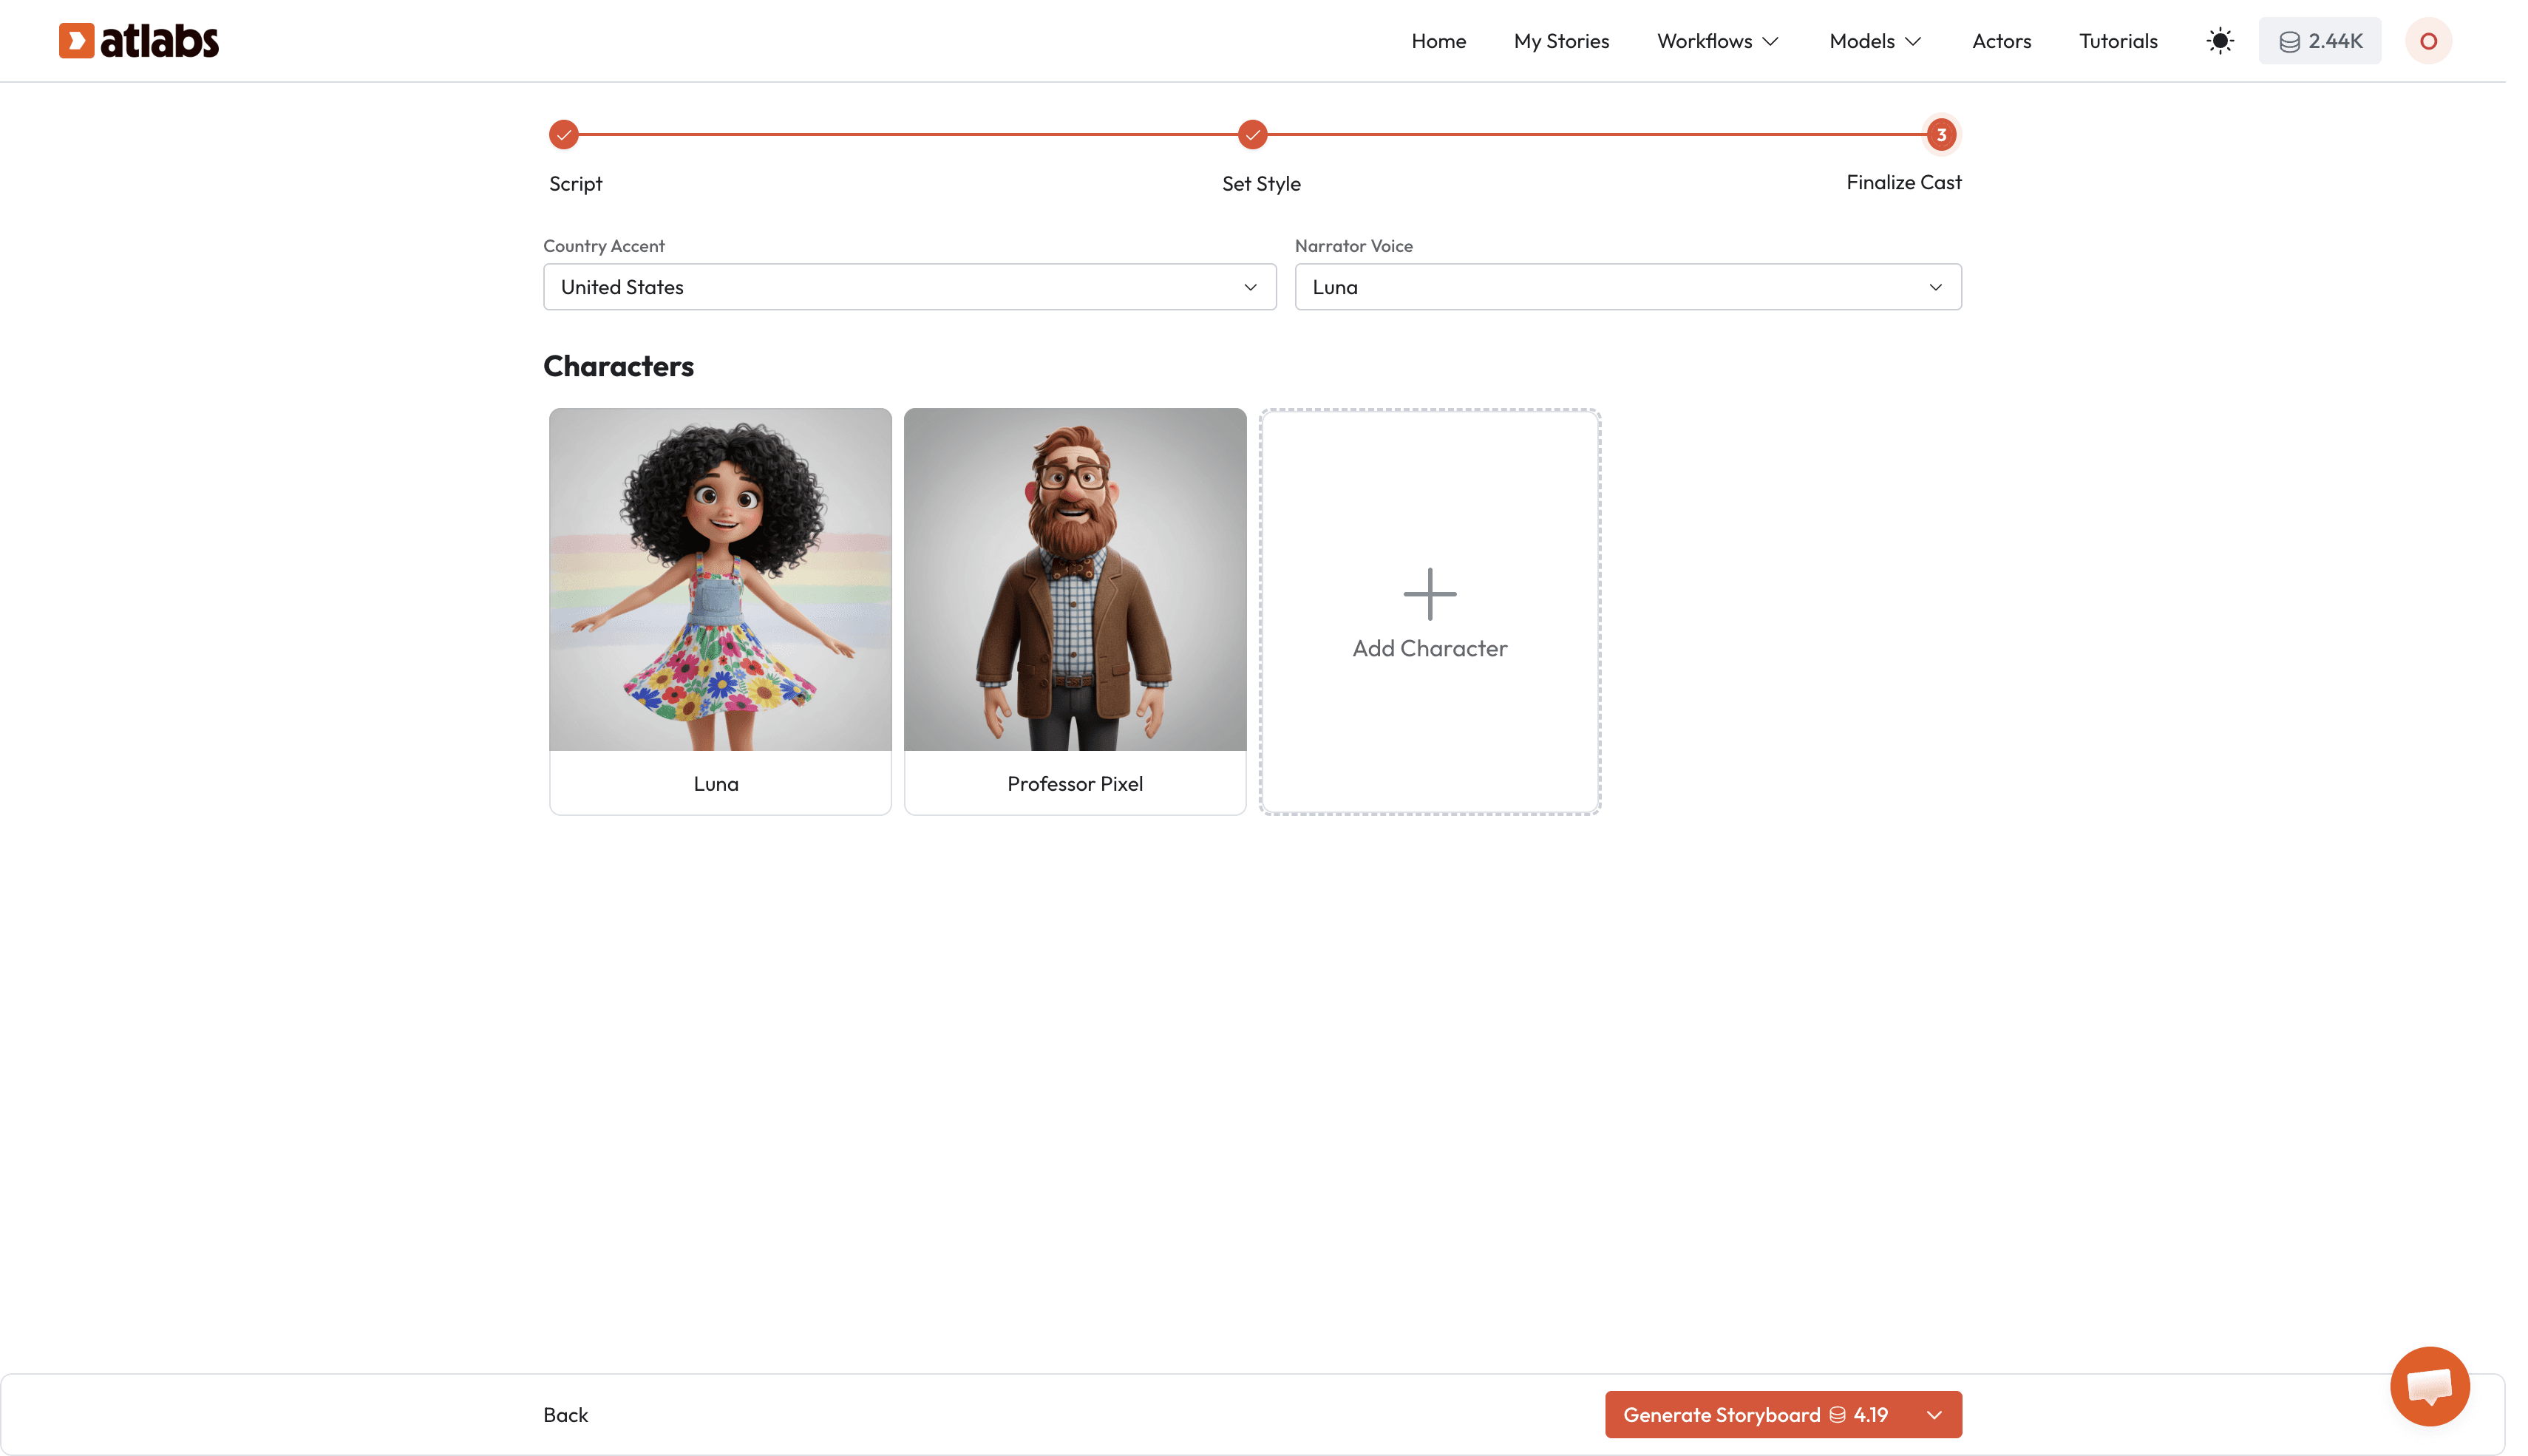
Step 3: Add Characters and Voices
Navigate to the Character Tab:
Upload your character references (or use previously saved characters)
Assign voices to each character from Atlabs' 100+ voice library
Select narrator voice
Your characters will appear in scenes based on your script, demonstrating and discovering concepts alongside young viewers.
Try Atlabs Now!
Step 4: Review Your Visual Sequence
Atlabs generates a storyboard showing each scene as a static image in sequence.
Check:
Does each scene clearly show the concept step you described?
Are characters positioned appropriately for the action?
Is the visual flow logical from one scene to the next?
Are the visual metaphors clear?
If a scene isn't quite right, adjust your script description and regenerate.
Example adjustment:
Original: [Scene showing atoms]
Revised: [Scene showing colorful bouncing balls representing atoms, with space between them]
The more specific you are, the better the visual matches your teaching intent.
Try Atlabs Now!
Step 5: Generate Final Video
Once your storyboard looks right, switch from Storyboard to AI Video mode and regenerate.
Atlabs converts your approved storyboard sequence into:
Animated scenes with character movement
Lip-synced dialogue
Smooth transitions between concept steps
Complete visual lesson ready to publish
Generation time: 3–5 minutes for a complete 2–3 minute concept explanation video.
Try Atlabs Now!
Concept Visualisation Examples Across Subjects
Here's how to apply this framework to different types of concepts:
Science Concepts (Processes)
The Water Cycle, Photosynthesis, Digestion, Weather Formation
Approach: Sequential scenes showing transformation
Scene 1: Starting state
Scene 2-4: Each transformation step
Scene 5: Return to beginning (if cyclical)
Script structure: [Show starting point] → [Show trigger] → [Show each transformation] → [Show end result]
Try Atlabs Now!
Math Concepts (Abstract Relationships)
Fractions, Multiplication, Place Value, Geometry
Approach: Physical manipulation by characters
Characters start with concrete objects (pizzas, blocks, shapes)
Characters manipulate objects to demonstrate concept
Visual results show the mathematical relationship
Script structure: [Character has objects] → [Character divides/groups/arranges] → [Character discovers pattern]
History Concepts (Time and Cause-Effect)
Historical Events, Inventions, Cultural Changes
Approach: Before/after comparisons with character witnesses
Scene 1: "Before" state with characters observing
Scene 2-3: Event/change happening
Scene 4: "After" state with characters reflecting
Script structure: [Show life before] → [Show what changed] → [Show impact of change]
Emotional Concepts (Internal States)
Empathy, Resilience, Friendship, Problem-Solving
Approach: Character experiences the concept through story
Character faces situation
Character feels/reacts
Character learns/grows
Visual metaphors for internal states (dark clouds for sadness, light for understanding)
Script structure: [Character in situation] → [Show feeling with visual metaphor] → [Show resolution]
Try Atlabs Now!
Common Mistakes to Avoid
Cramming too much into one scene One concept step = one scene. If you're trying to show evaporation, condensation, and precipitation in one visual, split it into three.
Using vague scene descriptions "Show the concept of gravity" won't generate useful visuals. "Show Luna dropping a ball and apple, both falling to the ground" will.
Skipping the character reaction Don't just show concepts happening. Show characters noticing, questioning, and discovering. That's what engages young viewers.
Moving too fast between steps Give each step its own moment. Kids need time to process one visual idea before moving to the next.
Forgetting the "why it matters" moment Always end with a character connecting the concept to real life: "That's why puddles disappear after rain!" or "Now we know why the moon looks different each night!"
Conclusion: Concepts Kids Can See, Understand, and Remember
The hardest part of teaching complex concepts isn't the explanation, it's making abstract ideas concrete enough for young minds to grasp.
Visual storytelling does that. But only if the visuals are clear, sequential, and tied directly to the learning objective.
The old barrier: Creating those visuals required animation skills, expensive software, and hours per concept.
The new workflow:
✅ Break concepts into simple sequential steps
✅ Write specific scene descriptions
✅ Generate storyboard to review visual flow
✅ Convert to animated video automatically
✅ Characters demonstrate concepts through action
Your job is understanding the concept well enough to break it down. Atlabs handles turning that breakdown into visuals kids can actually see and understand.
From abstract to concrete. From confusion to "Oh, now I get it!"
That's what visualizing complex concepts for kids should feel like, for both you and them.
Ready to turn complex concepts into clear visual lessons?