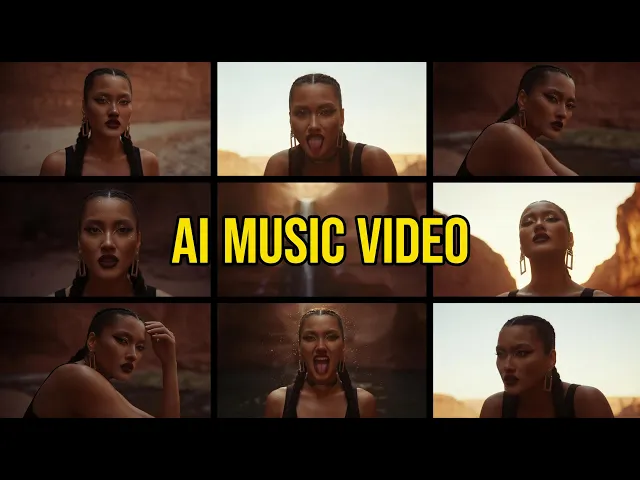
Atlabs is better if you have a finished track and want a complete music video built around it in about 10 minutes. Kling is better if you want the highest realism inside one short clip and you are happy to prompt, generate and edit every shot yourself. Atlabs reads your uploaded song and builds scenes from its tempo, mood and genre. Kling hands you a very strong clip generator and leaves the assembly to you.
Atlabs vs Kling: The Ultimate Guide Comparison Table
Both tools generate video with AI, but they solve different halves of the same problem for an indie artist. One starts with your song. The other starts with a shot description.
What matters to an indie artist | Atlabs | Kling |
|---|---|---|
Best for | Turning a finished track into a full music video | Generating one high realism clip at a time |
Workflow style | Guided 5 step Music Video workflow, audio first | Prompt or image to clip, one generation per shot |
Music input | Upload an mp3 up to 200MB or paste a Suno URL, then click EXTRACT MUSIC | No track upload that drives scene planning, audio is generated per clip |
Scene planning | 6 scene concepts generated from your track tempo, mood and genre | You write every shot prompt yourself |
Character consistency | Cast step builds character reference sheets reused across scenes | Elements combines reference images inside a single generation |
Model lineup | Kling 3.0, Kling 2.6, Google Veo 3.1, Seedance 2.0, Hailuo 2.3, Wan 2.6 and Runway in one interface | Kling models only |
Learning curve | Beginner friendly, the steps carry you | Moderate, prompt craft decides your result |
Free tier | Free tier available | Free tier available |
One line in that table deserves a second look. Kling models run inside Atlabs. So the real question is not whether you want Kling quality. It is whether you want to assemble a music video shot by shot, or hand your track to a workflow that plans the scenes for you.
Where Atlabs Wins for Indie Artists, Step-by-Step
The first advantage is that your song is the input. In the Music Video workflow you upload an mp3 or paste a Suno URL and click EXTRACT MUSIC, and Atlabs detects the track properties for you. In the Concepts step it then shows 6 scene concepts described as cards, generated from your tempo, mood and genre. An indie artist with a lo-fi instrumental and no idea what the video should look like gets six starting points instead of a blank prompt box.
The second advantage is consistency across the whole video rather than inside one clip. The Cast step builds a reference sheet for each character with multiple angles and a portrait, and those characters carry through the scenes. If your video follows one person walking through a city at night, that person still looks like the same person in scene four. Clip by clip prompting is where most indie music videos fall apart, and this step is what removes that problem.
The third advantage is model range without seven accounts. Kling 3.0 and Kling 2.6 for cinematic motion, Google Veo 3.1 for wide establishing shots, Seedance 2.0 for stylised character closeups, Hailuo 2.3 for high motion sequences and Wan 2.6 for cinematic depth all sit behind one interface. You can pick the model that suits the section of your track instead of forcing every shot through the same one. Finishing tools sit in the same account too, so Reframe, Upscale, Caption Video and Lip Sync are one click away when the video is done.
How to Make Your Indie Music Video with Atlabs, Step-by-Step
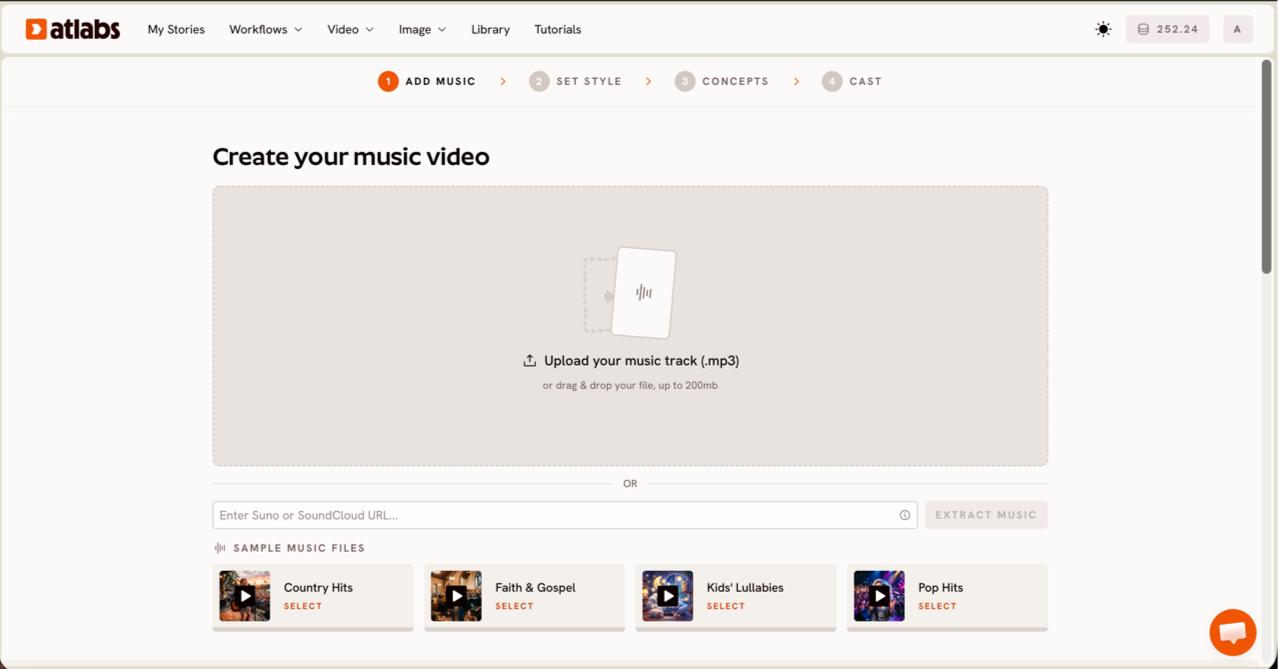
Step 1. Add Music
The screen header reads Create your music video. Upload an mp3 of up to 200MB or paste a Suno music URL, then click EXTRACT MUSIC. Atlabs reads the track properties from the file, so your genre and tempo already inform everything that follows.
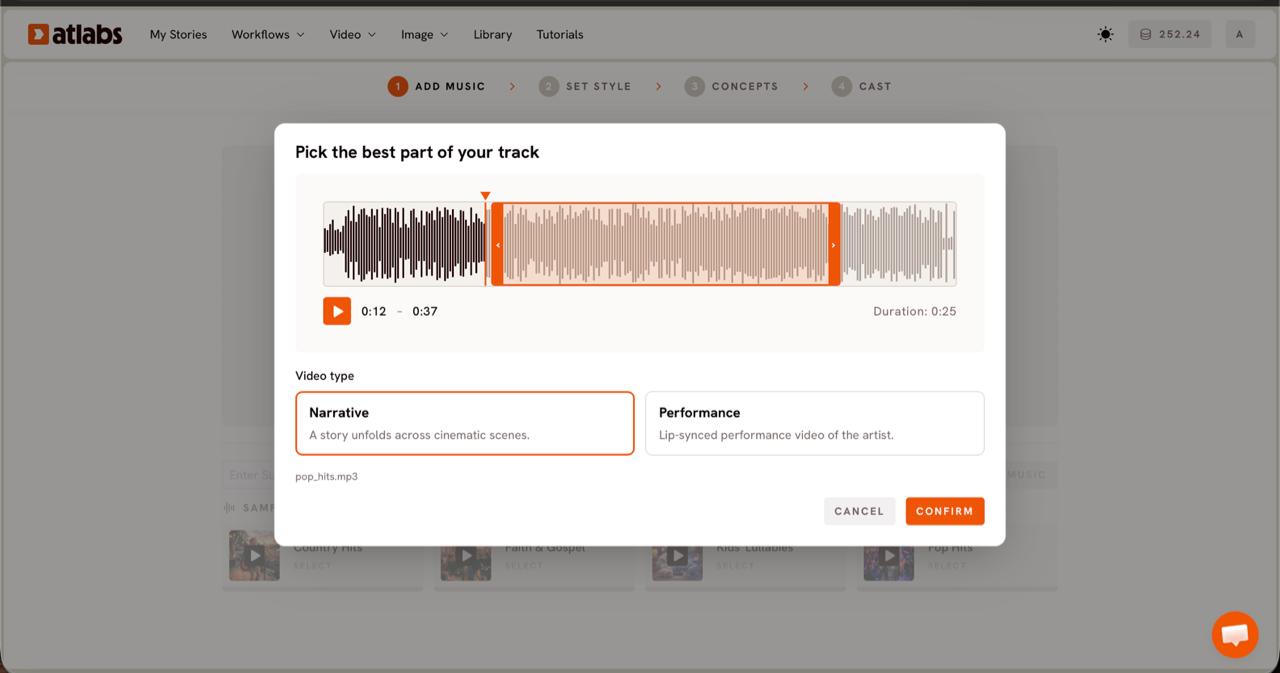
Step 2. Video Type
The Pick the best part of your track modal opens. Drag the green selection window across the waveform to choose your segment, usually up to around 25 seconds. Then pick Narrative if you want a story unfolding across cinematic scenes, or Performance if the song has vocals and you want a lip synced performance video.
Step 3. Set Style
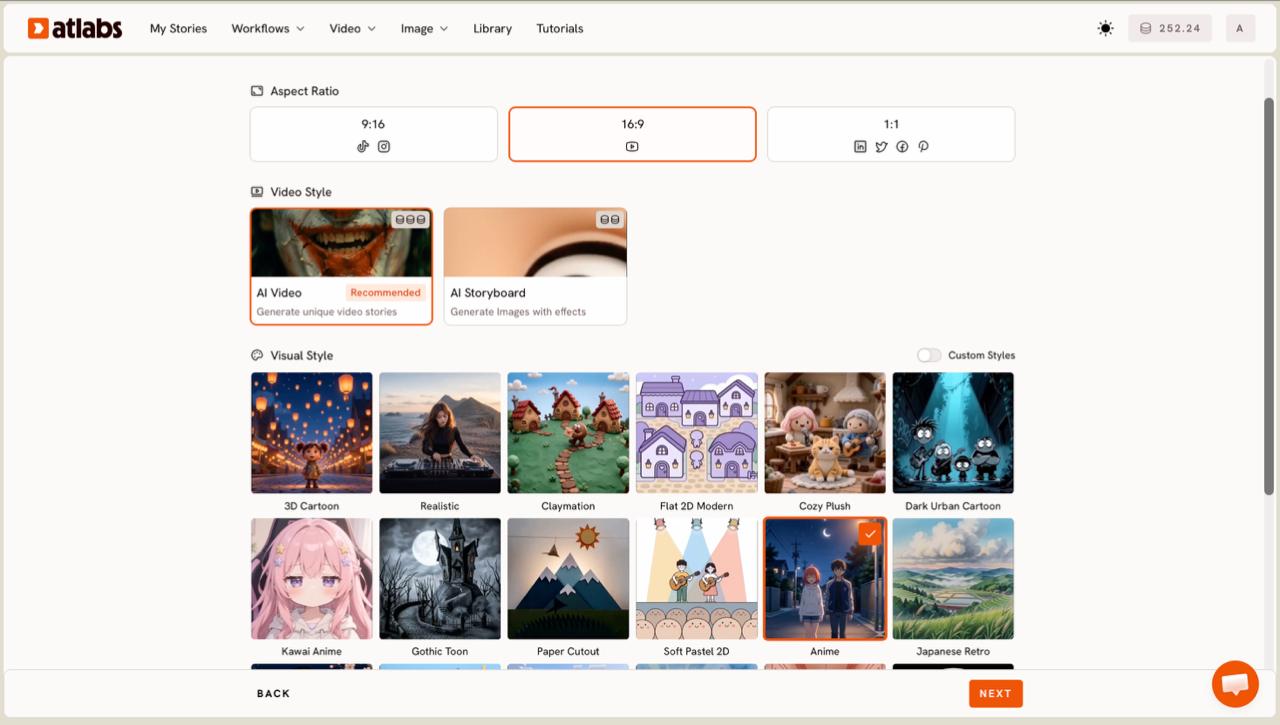
Choose your Aspect Ratio, 9:16 for TikTok and Instagram, 16:9 for YouTube or 1:1 for square posts. Set the Video Style to AI Video, which is recommended and generates unique video stories, or AI Storyboard if you want images with effects. Then pick a Visual Style. For a cinematic indie look, Realistic is the one to start with, and toggling Custom Styles opens the full library.
Step 4. Concepts
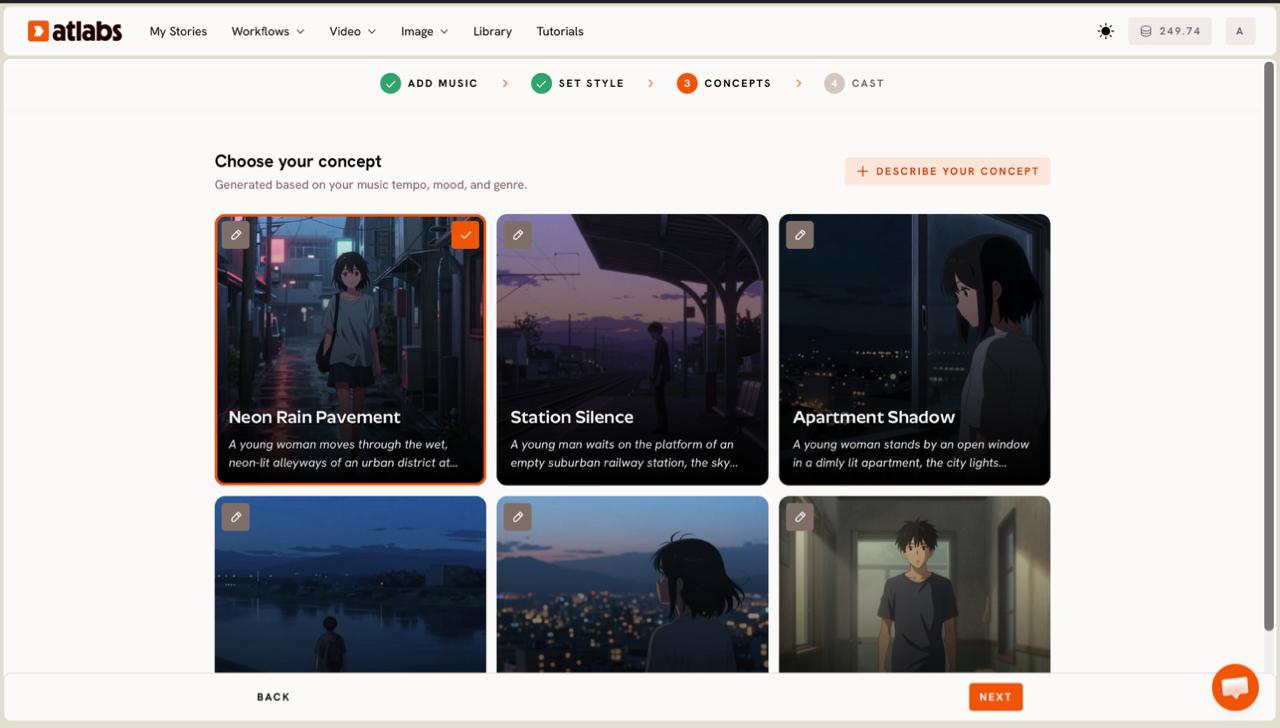
The screen reads Choose your concept, generated based on your music tempo, mood and genre. Six concept cards appear, each with a title and a short scene description. The selected card shows a green tick and every card has an edit pencil if you want to adjust the direction. If none of them match what you hear in the track, click DESCRIBE YOUR CONCEPT and write your own.
A single figure walks a rain soaked side street after midnight, shot handheld at eye level. Sodium street lamps and shop signage reflect off wet asphalt. Slow forward push, shallow depth of field, muted teal and amber grade, film grain, no camera shake on the beat drops.
Step 5. Cast
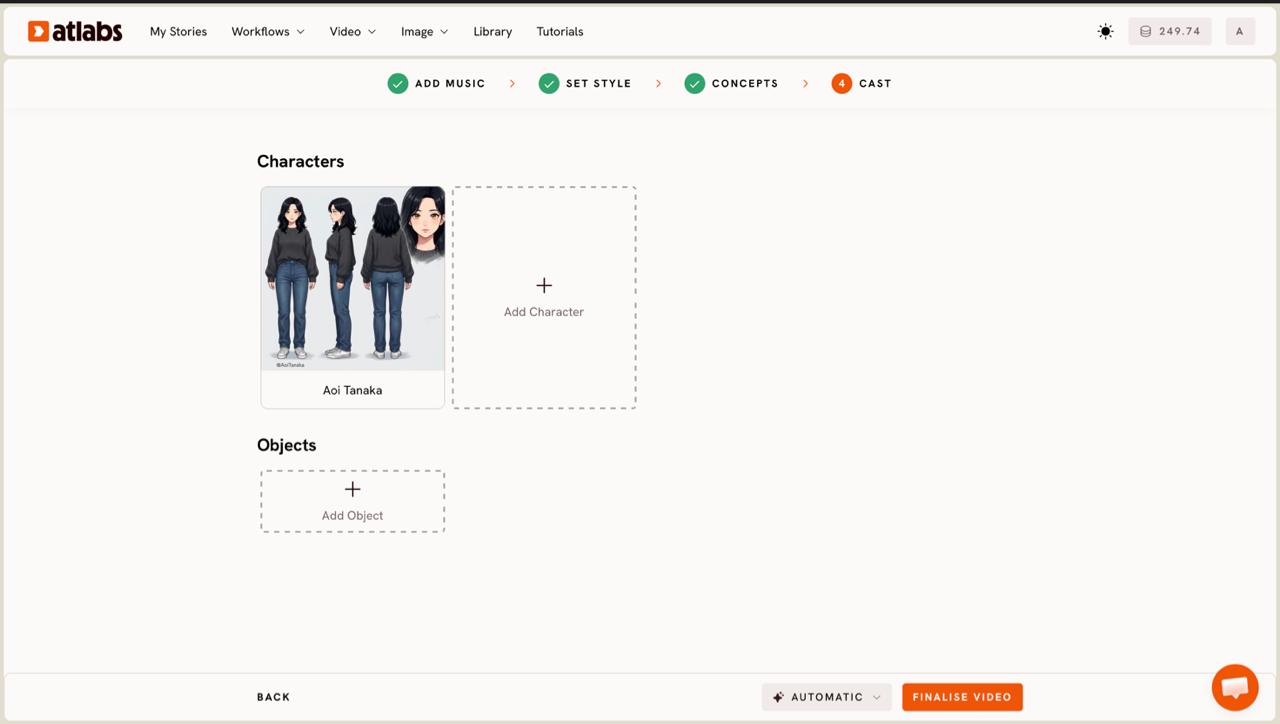
Define your Characters and Objects. Each character card shows the generated reference sheet with multiple angles and a portrait, and clicking any empty slot lets you Add Character. The Click to edit overlay opens the character editor if the face or wardrobe needs adjusting. Objects at the bottom are optional, and they are worth using when a prop carries the story, such as an instrument or a car.
That is the whole run. Most indie artists get through these five steps in around 10 minutes, and the generation happens after that while you do something else.
Watch the Free Atlabs Music Video Tutorial, Step-by-Step
If you would rather watch the five steps than read them, the walkthrough below covers the same run from an uploaded track to a finished cinematic video.
Where Kling Wins: A Beginner Guide to Its Real Strengths
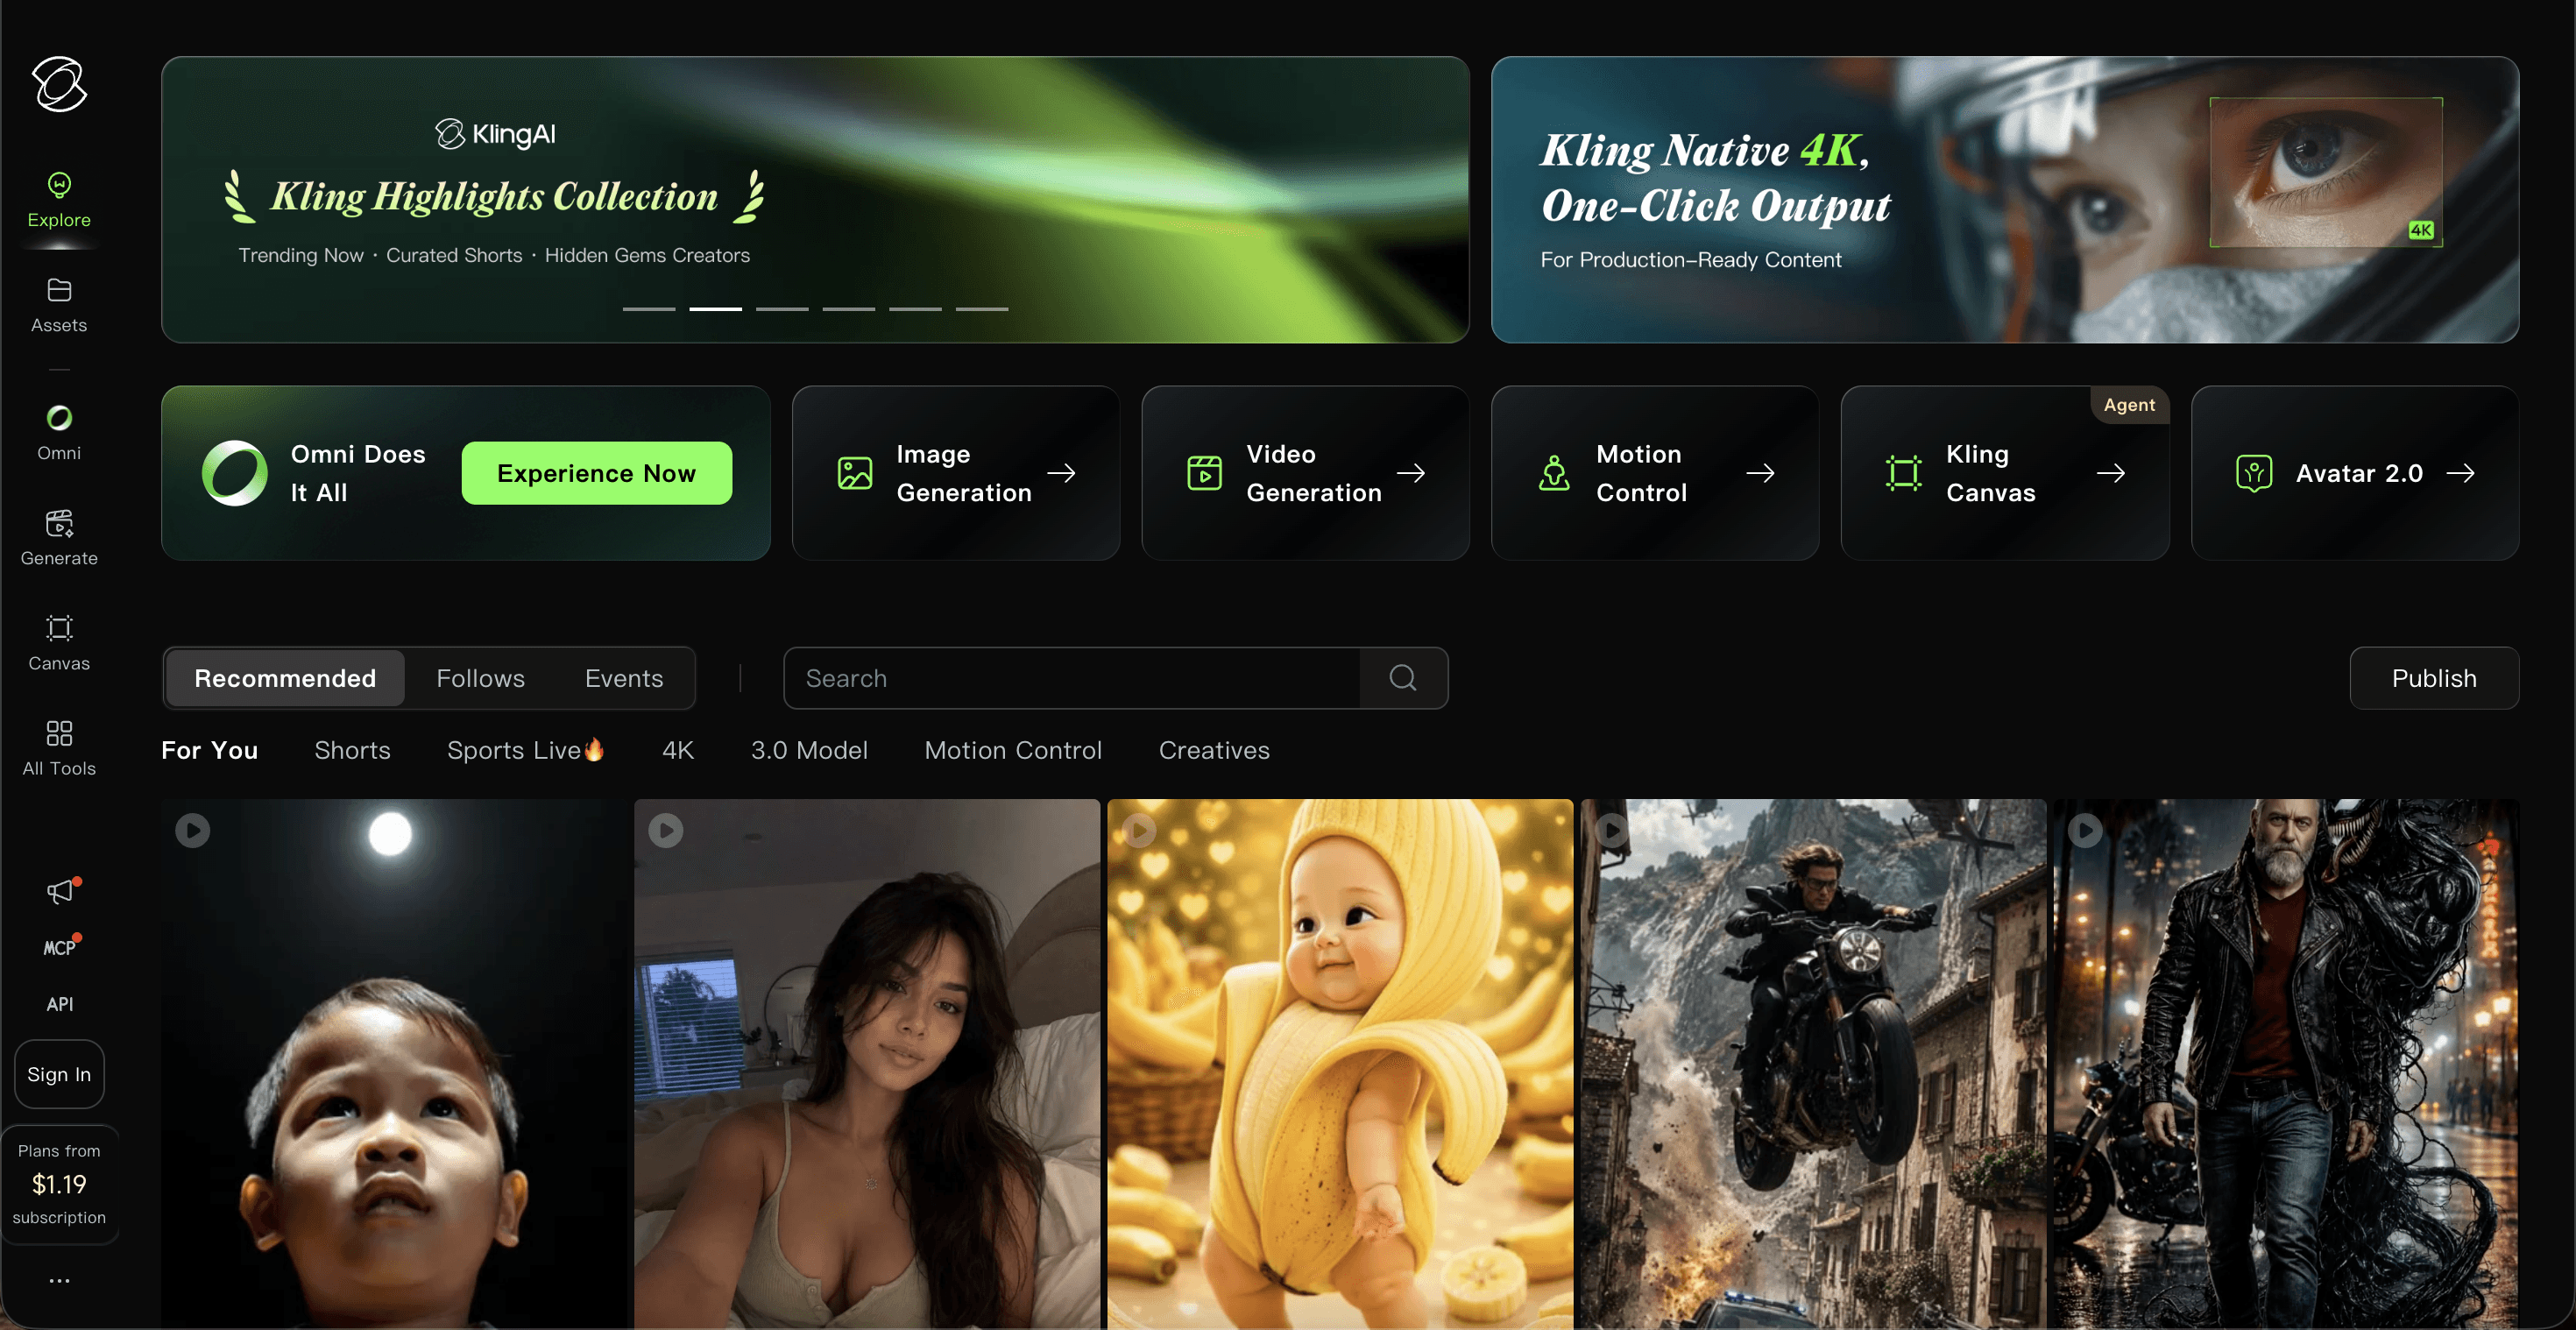
Kling deserves its reputation. Its human realism inside a single clip is still one of the strongest available, and for a close performance shot where skin, fabric and light have to read as filmed rather than generated, it holds up under scrutiny that most models do not survive. Its newest release pushes native audio and higher resolution output, which matters if you are cutting a video for a large screen.
It also gives a director more direct control per shot. Motion brush, first and last frame positioning and reference video workflows let you dictate exactly how something moves rather than describing it and hoping. If you already storyboard your videos and you enjoy the craft of prompting each shot, that control is real and Atlabs does not replicate all of it at the shot level.
The tradeoff is assembly. Clips are short, your song is not part of the planning, and the cut between scenes is your job in an external editor. For a three minute track that is a long evening of work.
Pros and Cons: The Ultimate Guide Snapshot
Tool | Pros | Cons |
|---|---|---|
Atlabs | Your uploaded track drives the whole video, 6 scene concepts generated from tempo and mood, reusable cast across scenes, Kling plus Veo plus Seedance and more in one interface, finishing tools in the same account | So many models and styles can feel like a lot at first also Audio to video sits on the Pro plan and above |
Kling | Best in class realism inside a single clip, motion brush and first and last frame control, native audio on the newest models, strong reference image consistency | No track led scene planning, short clips, you assemble and cut the full video yourself, one model family only |
Which One to Pick: A Beginner Guide to the Decision
Pick Atlabs if you have a finished track, you want a watchable music video this week, and you would rather choose between six generated concepts than write twenty shot prompts. Pick Atlabs also if your video needs the same character in every scene, or if you want to test the same section of your song across Kling, Veo and Seedance before committing.
Pick Kling if you are producing one hero shot rather than a full video, if photoreal human closeups are the entire point, or if you already work in a timeline editor and want granular control over motion in each clip. Both are strong tools. The difference is whether your starting point is a song or a shot.
<a class="cta-button" href="https://app.atlabs.ai/new-music">Upload your track and see the concepts</a>
Scoring Table: Atlabs vs Kling, Step-by-Step by Category
Category | Atlabs | Kling |
|---|---|---|
Speed from track to finished video | 9 / 10 | 5 / 10 |
Scene concepts generated from your music | 9 / 10 | 4 / 10 |
Single clip realism | 8 / 10 | 7 / 10 |
Character consistency across a whole video | 9 / 10 | 7 / 10 |
Model choice in one account | 10 / 10 | 6 / 10 |
Beginner friendliness | 9 / 10 | 6 / 10 |
Shot level control for a director type | 9 / 10 | 8 / 10 |
Finishing tools in the same place | 9 / 10 | 5 / 10 |
Total | 72 / 80 | 48 / 80 |
FAQ
Is Kling better than Atlabs for AI music videos in 2026?
Kling is better for the realism of a single clip, especially close shots of people. Atlabs is better for producing a complete music video from your track, because your song drives the scene concepts and the cast carries across the whole video. Kling models also run inside Atlabs, so choosing Atlabs does not mean giving up Kling output.
Can I use my own song instead of AI generated music?
Yes. In Step 1 of the Music Video workflow you upload an mp3 of up to 200MB, or paste a Suno music URL and click EXTRACT MUSIC. Atlabs reads the track properties and uses your tempo, mood and genre to generate the scene concepts in Step 4.
How long does an AI music video take to make on Atlabs?
The five steps take most indie artists around 10 minutes of hands on time. Generation runs after that, so the total wall clock time depends on the length of the segment you selected and the model you chose.
Which visual style works best for an indie or lo-fi track?
Realistic is the usual starting point for indie, lo-fi and instrumental tracks because it gives the cinematic live action feel most artists are after. Toggle Custom Styles in the Set Style step to see the full library if you want something more stylised.
Get started
You have a track. The fastest way to know which tool fits it is to run one section of your song through the Music Video workflow and look at the six concepts it comes back with.