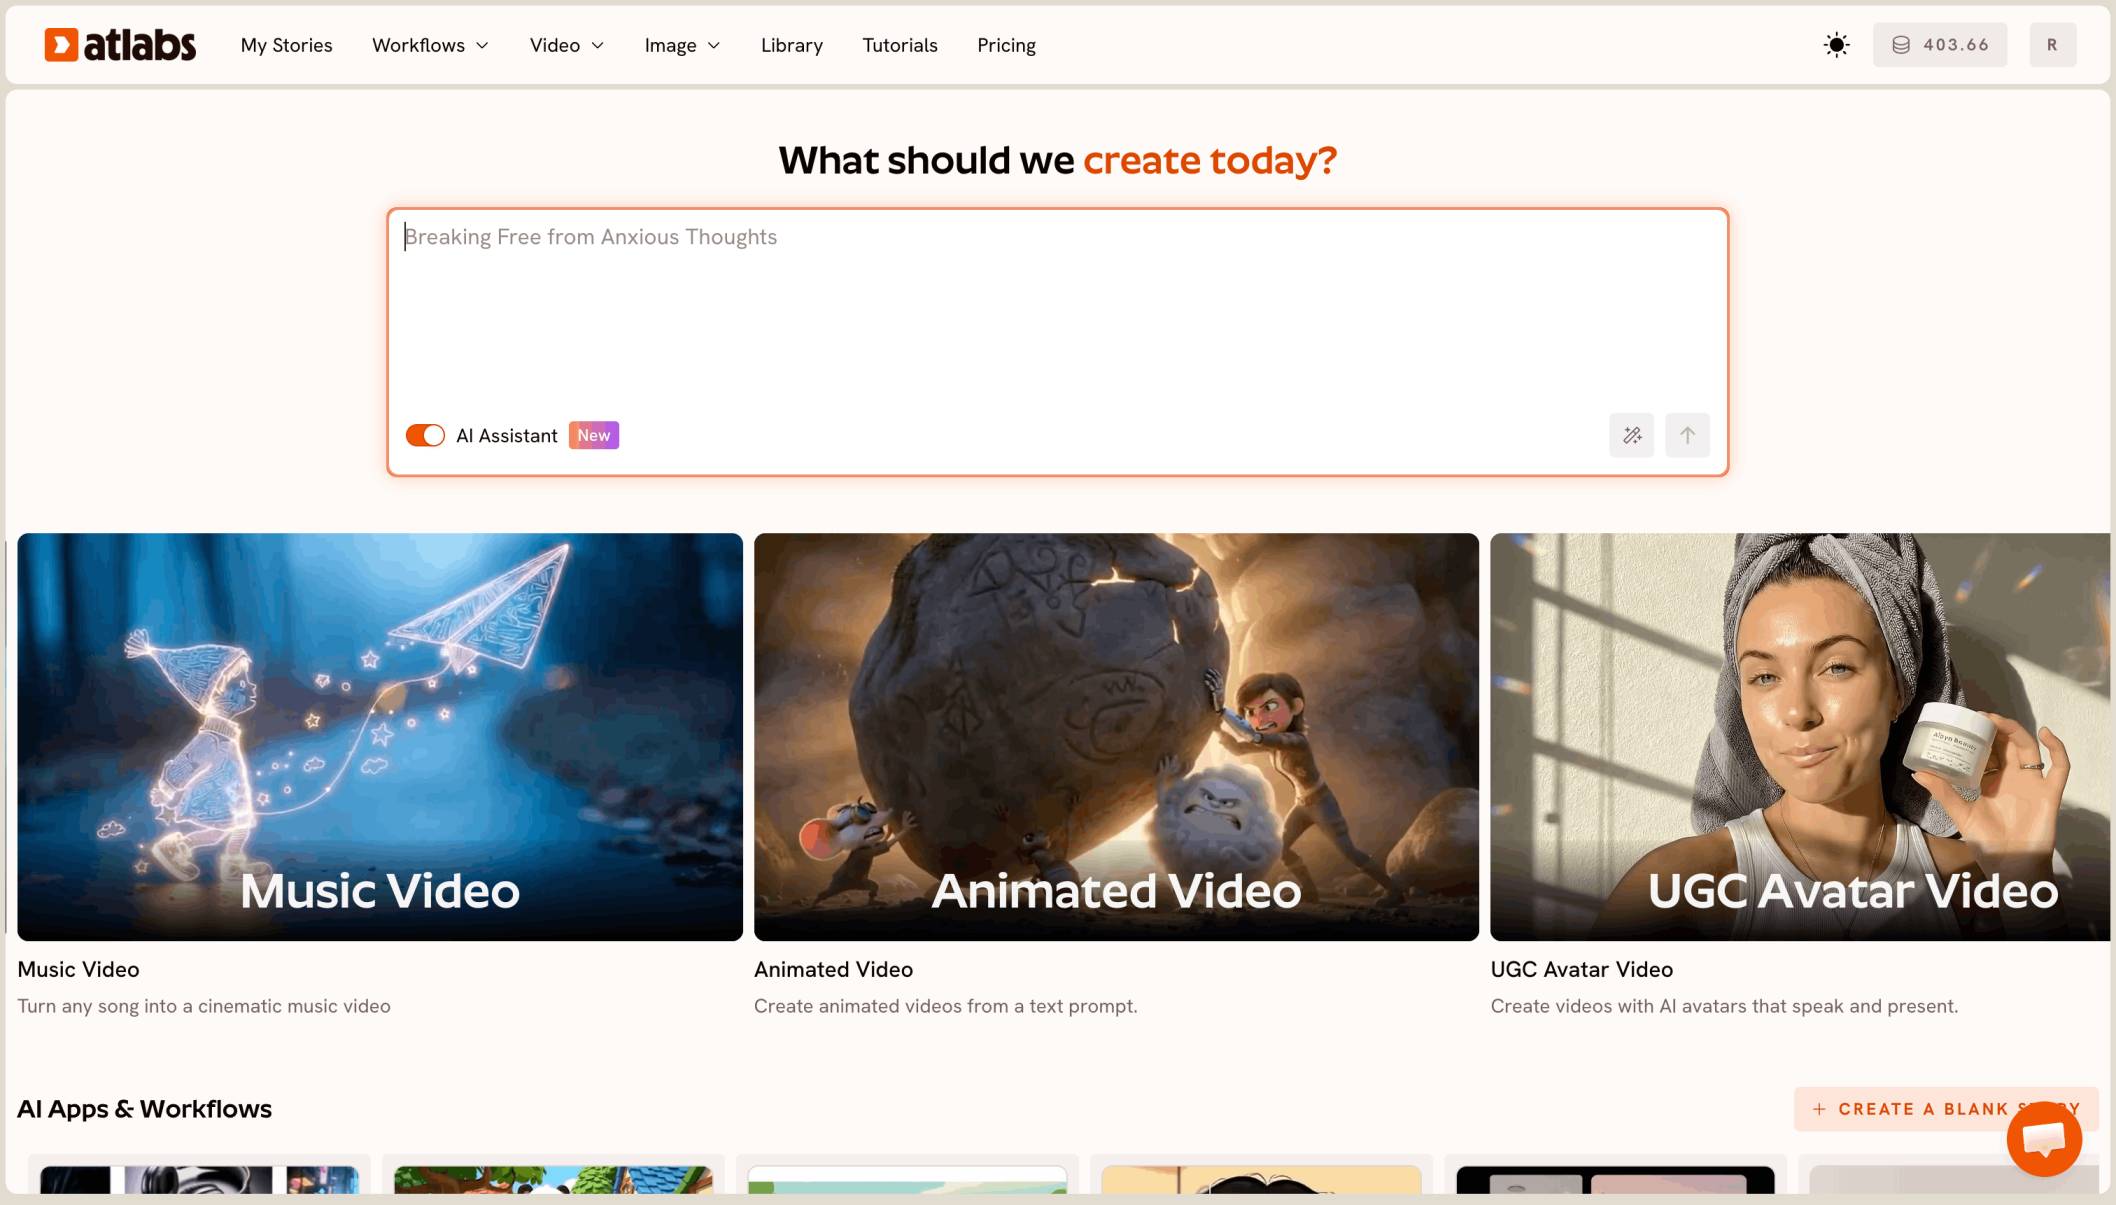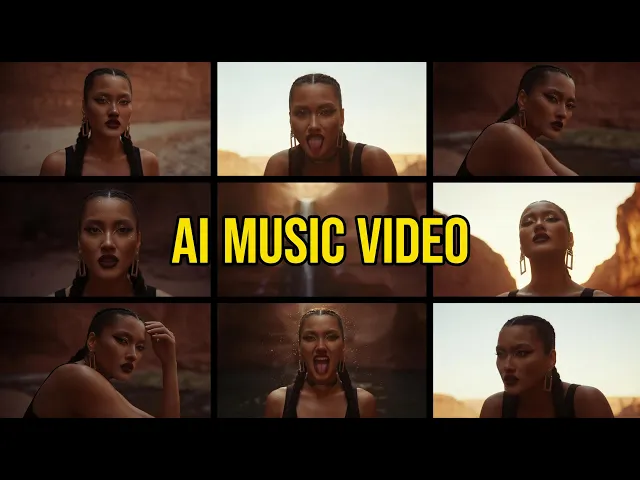
The fastest way to make an AI video look realistic is to pick a model built for photorealism, choose the Realistic visual style, write concept prompts with specific lighting and camera language, and keep your characters consistent across every scene. On Atlabs, indie artists do this inside the Music Video workflow, which pairs models like Kling 3.0 and Google Veo 3.1 with style and casting controls that remove the flat, plastic look most AI clips get stuck with. These twelve techniques cover every stage of that process.
What You Will Need
To follow this walkthrough you need an Atlabs account, your finished indie track as an mp3 file or a Suno link, ten to fifteen minutes of focused time, and a rough sense of the mood you want on screen. You do not need editing software, a camera, or any prior experience with AI video tools. Every technique below works inside the same Music Video workflow, so there is nothing extra to install or learn before you start.
12 Proven Techniques to Make Your AI Video Look Realistic
Realistic AI video rarely comes down to one setting. It is a stack of small, deliberate choices made at every step of the Music Video workflow, plus a few habits that have nothing to do with software at all. Here is the full stack, in the order an indie artist will actually use it.
1. Start With the Realistic Visual Style, Not a Stylized One
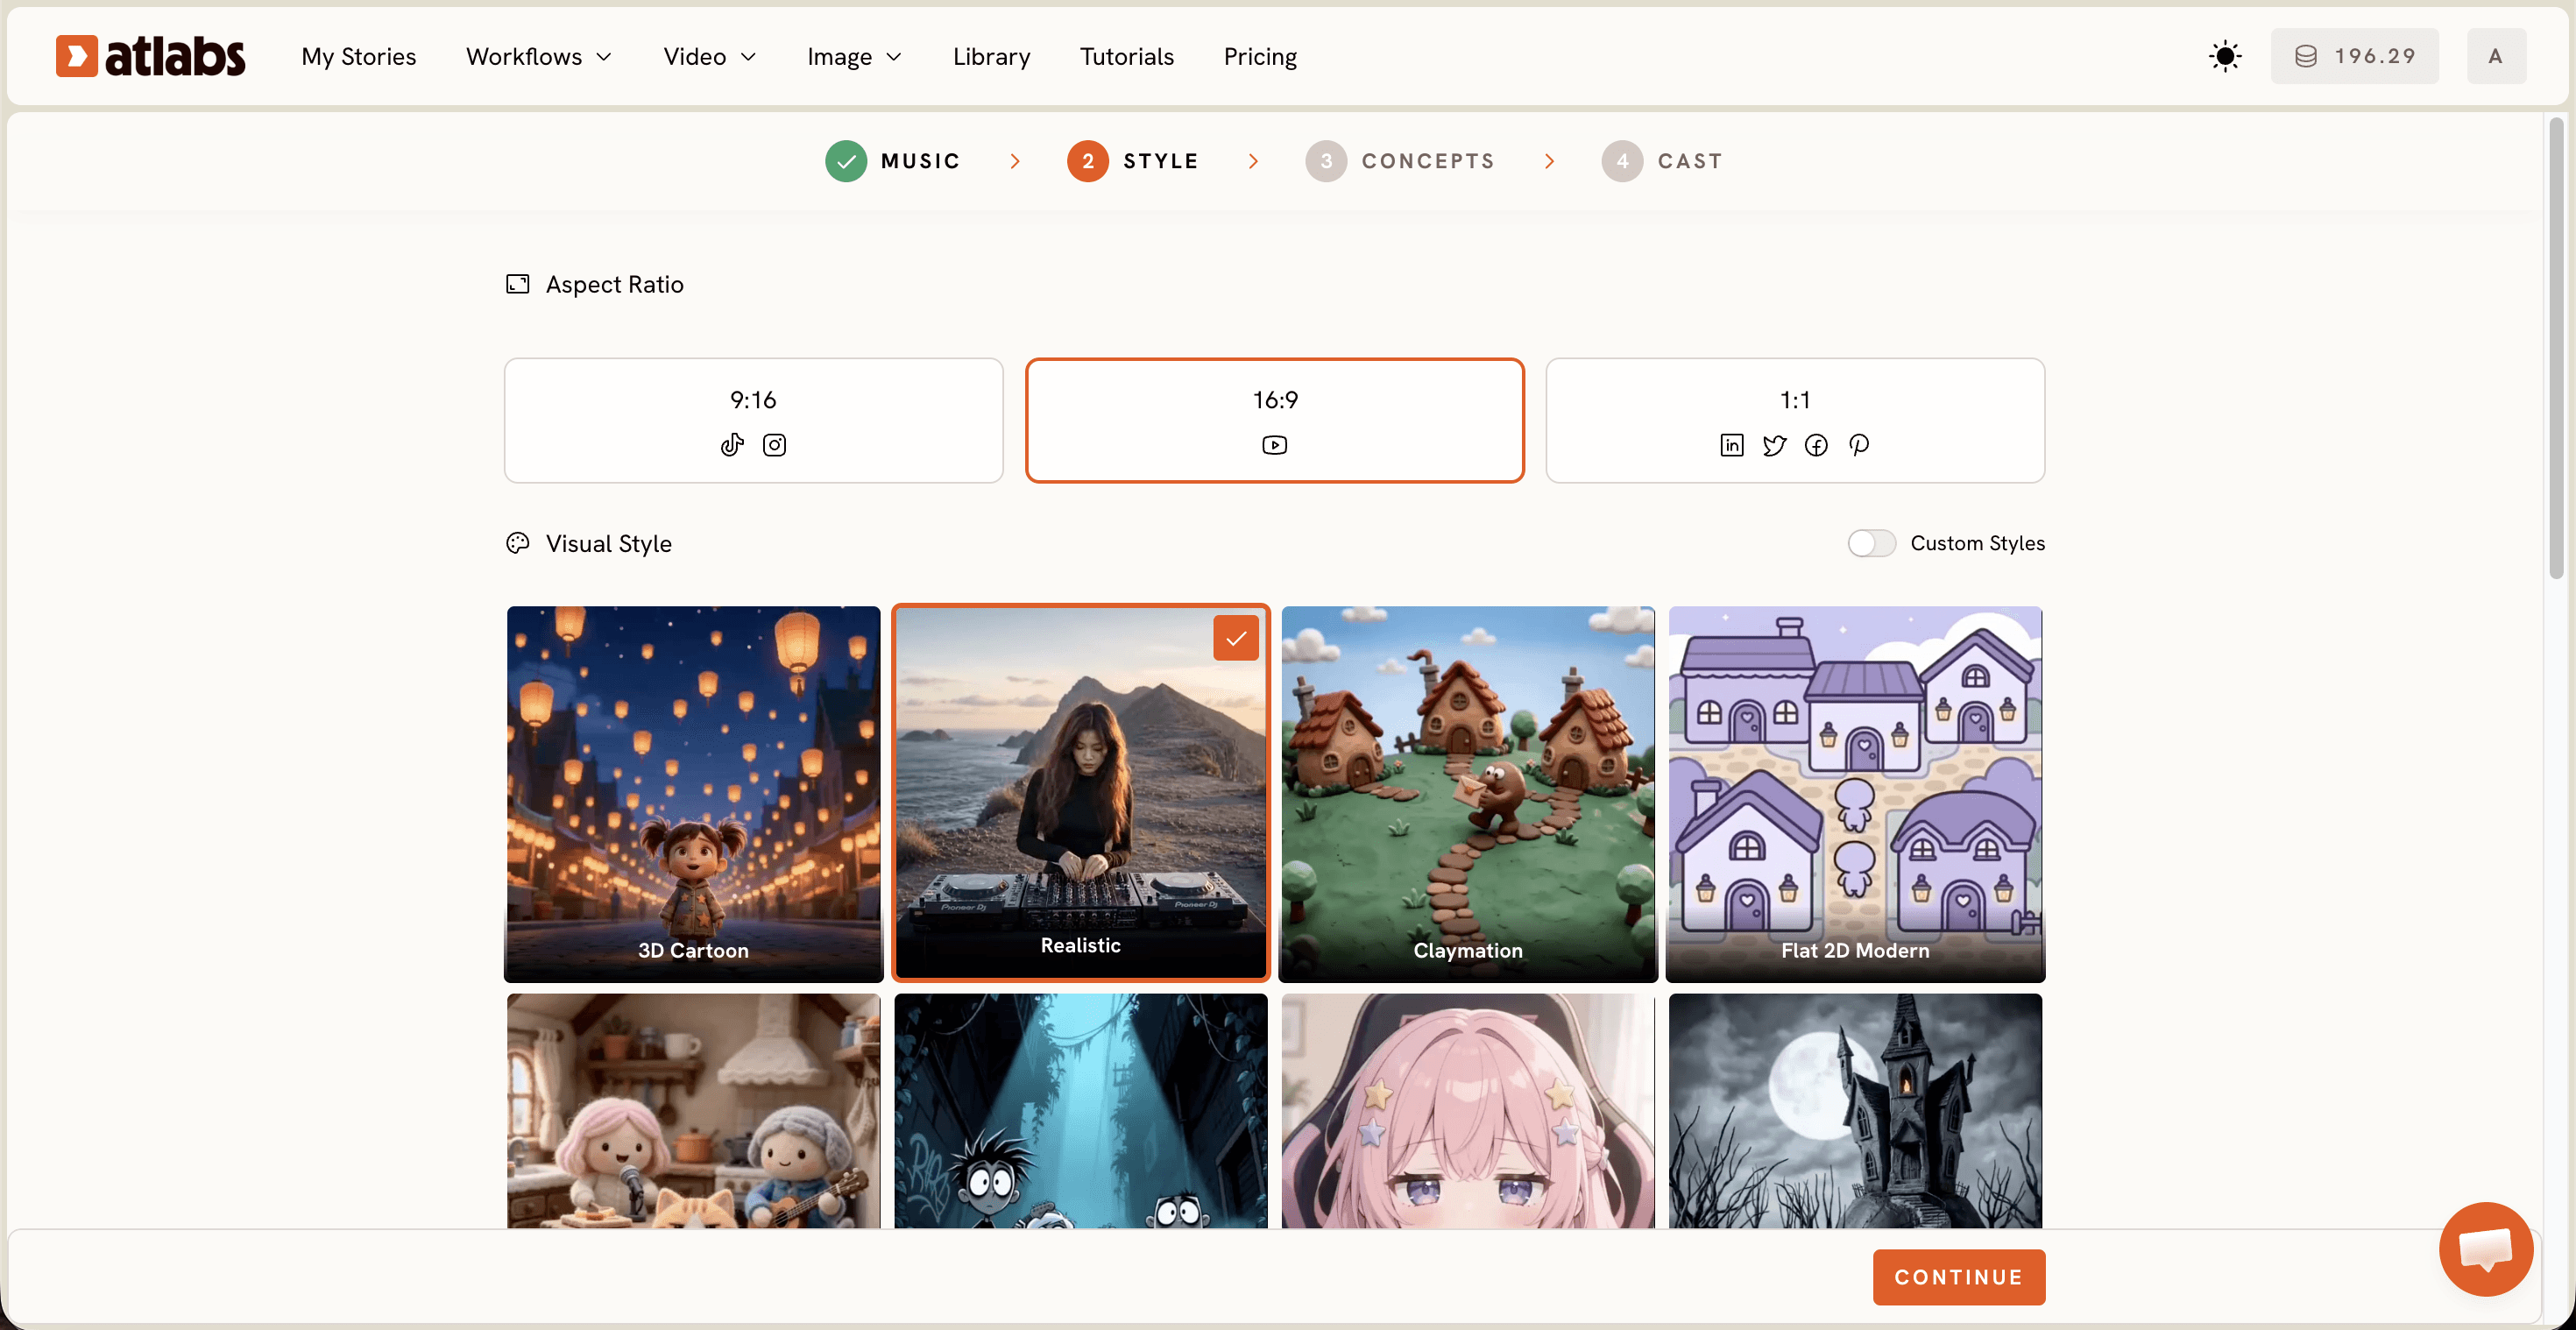
Inside Set Style, the Visual Style library includes options like 3D Cartoon, Claymation, and Paper Cutout alongside Realistic. Picking Realistic from the start matters more than any prompt tweak that comes later, because the base style sets the texture, lighting, and proportions every generated frame builds from. Indie artists chasing a live action feel should treat this as the first decision, not an afterthought.
2. Pick a Model Built for Photorealism
Atlabs gives you access to several models inside the same workflow, and they are not interchangeable. Kling 3.0 handles cinematic motion and smooth movement well, while Google Veo 3.1 is strong for photorealism and wide establishing shots. For a performance heavy indie track, pairing Kling for movement with Veo for wide shots tends to read as far more lifelike than defaulting to whichever model loads first.
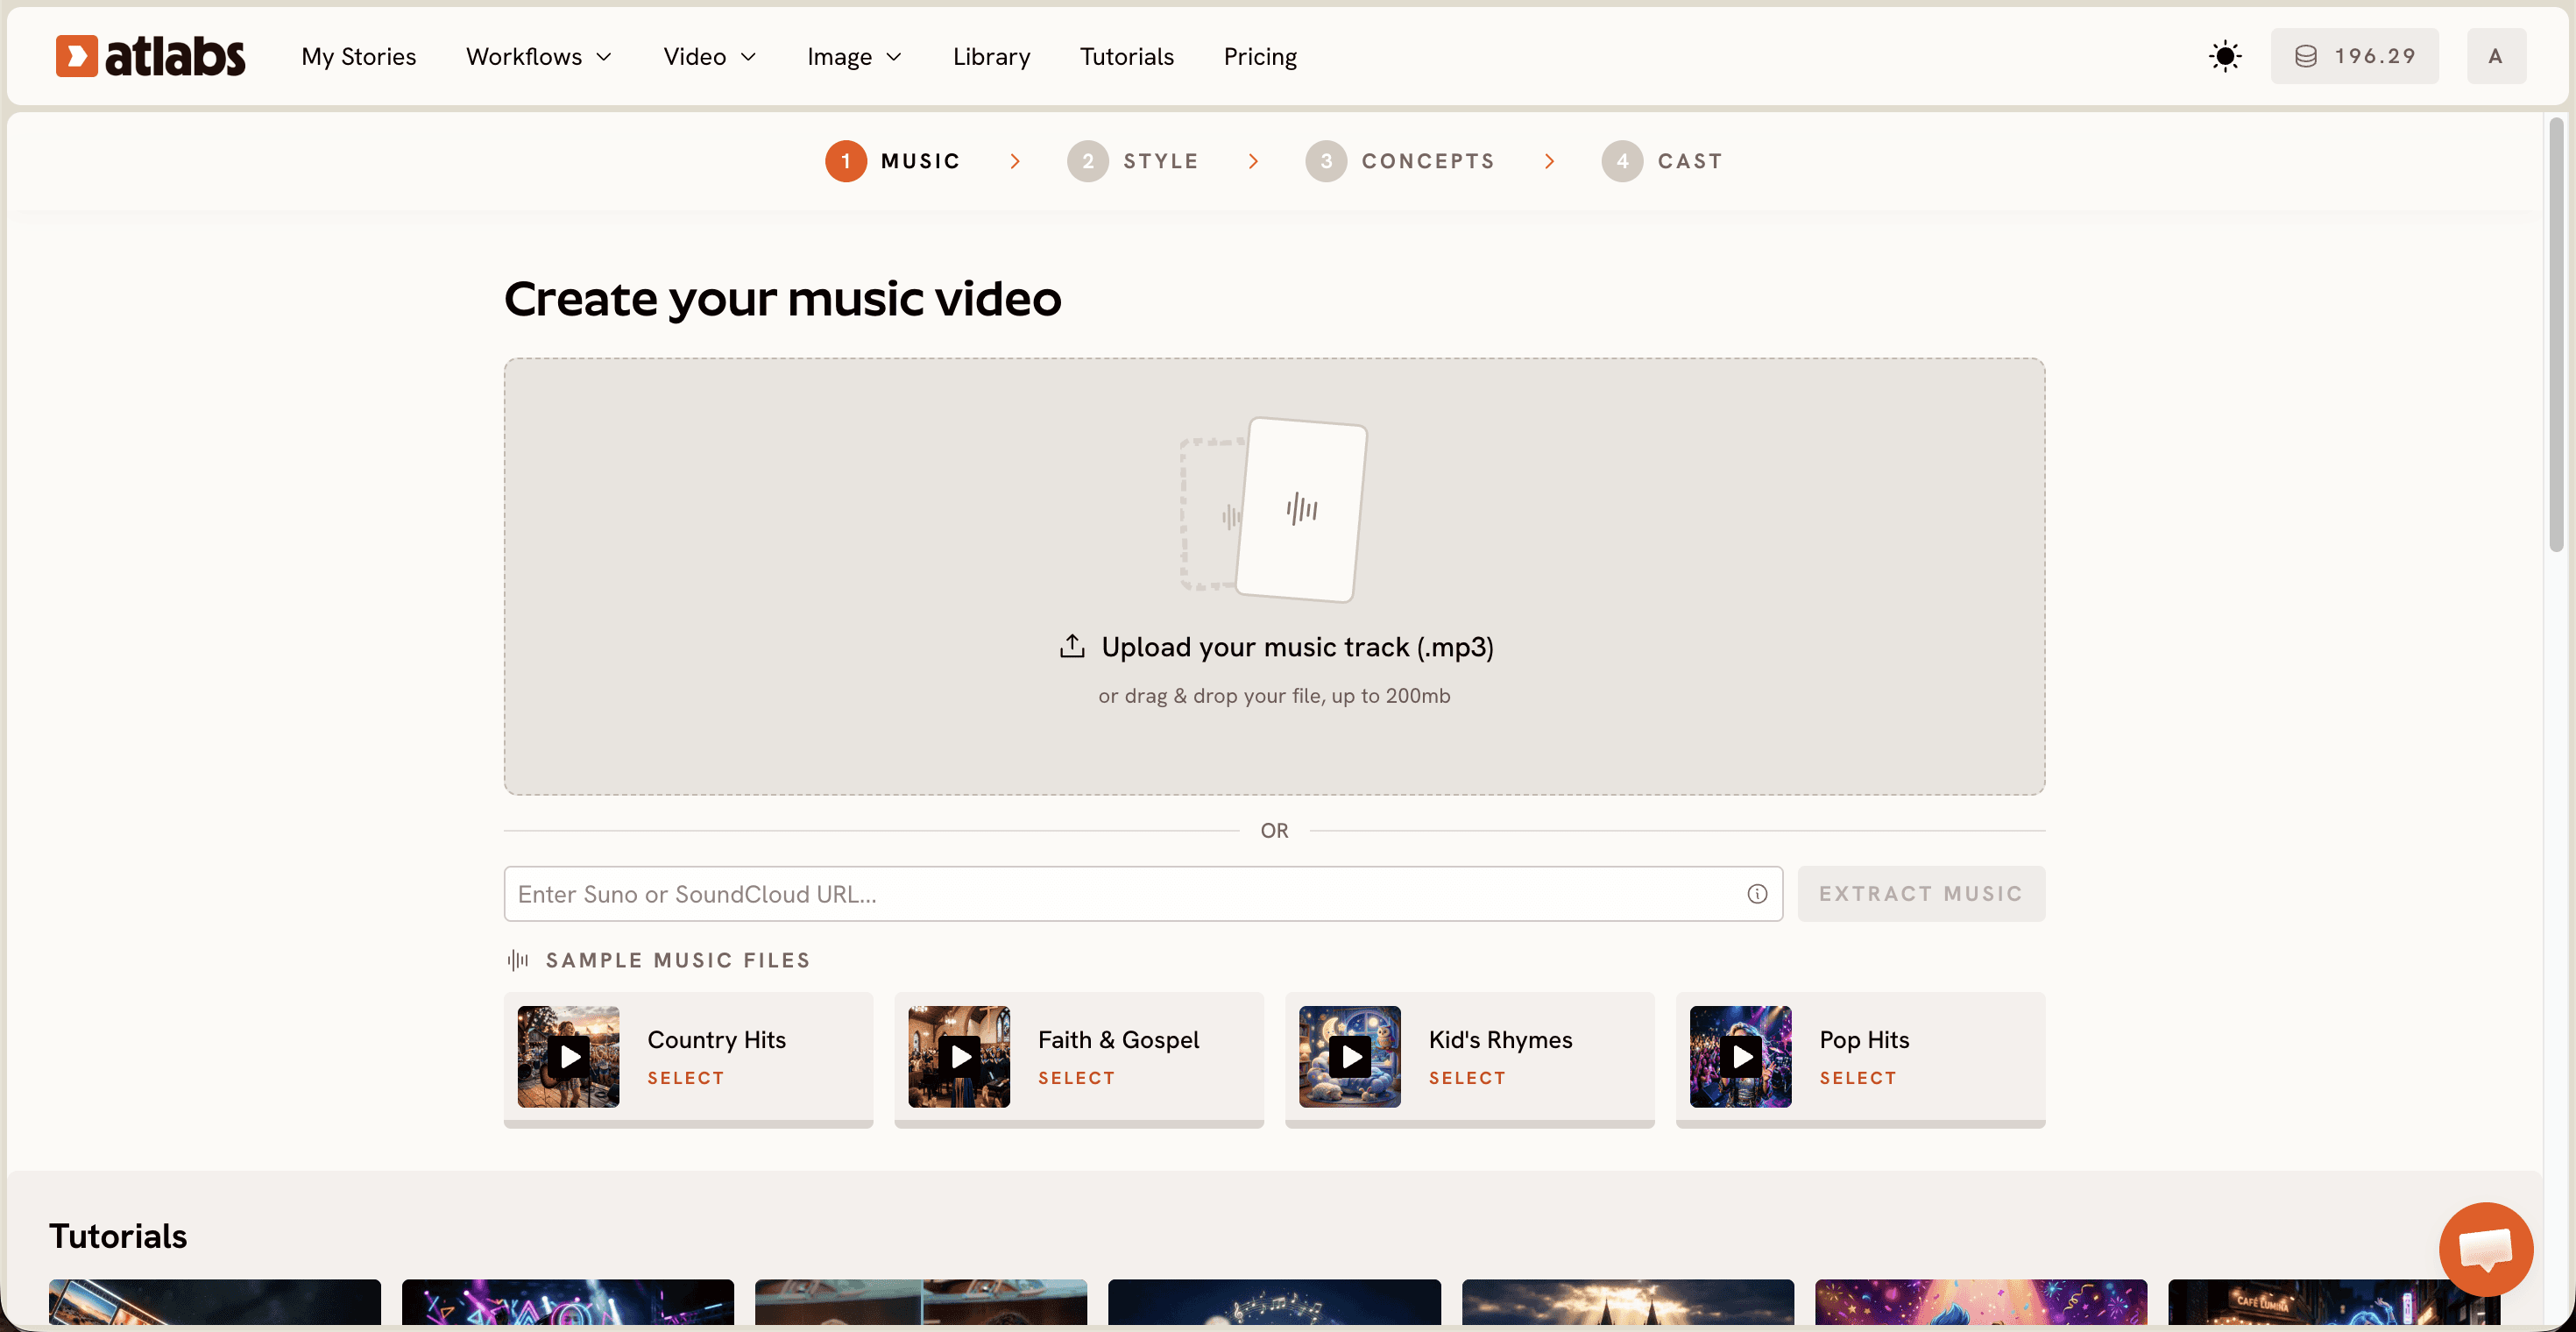
3. Upload the Actual Track, Not a Placeholder Beat
Open the Music Video workflow and use Add Music to upload your mp3, up to 200MB, or paste a Suno link and click Extract Music. Atlabs reads the real tempo, mood, and genre of your indie track to generate scene concepts later. A placeholder beat or a rough demo throws off every concept the workflow suggests, so use the final mix if you have one.
4. Choose the Right Segment and Video Type
In the Video Type step, drag the selection window across the waveform to pick the strongest part of your indie track, typically up to about 25 seconds. Then choose Narrative if you want a story to unfold across cinematic scenes, or Performance if you want a lip synced performance video with the artist on screen. Realism reads differently depending on which one you pick, so match it to the footage you are imagining.

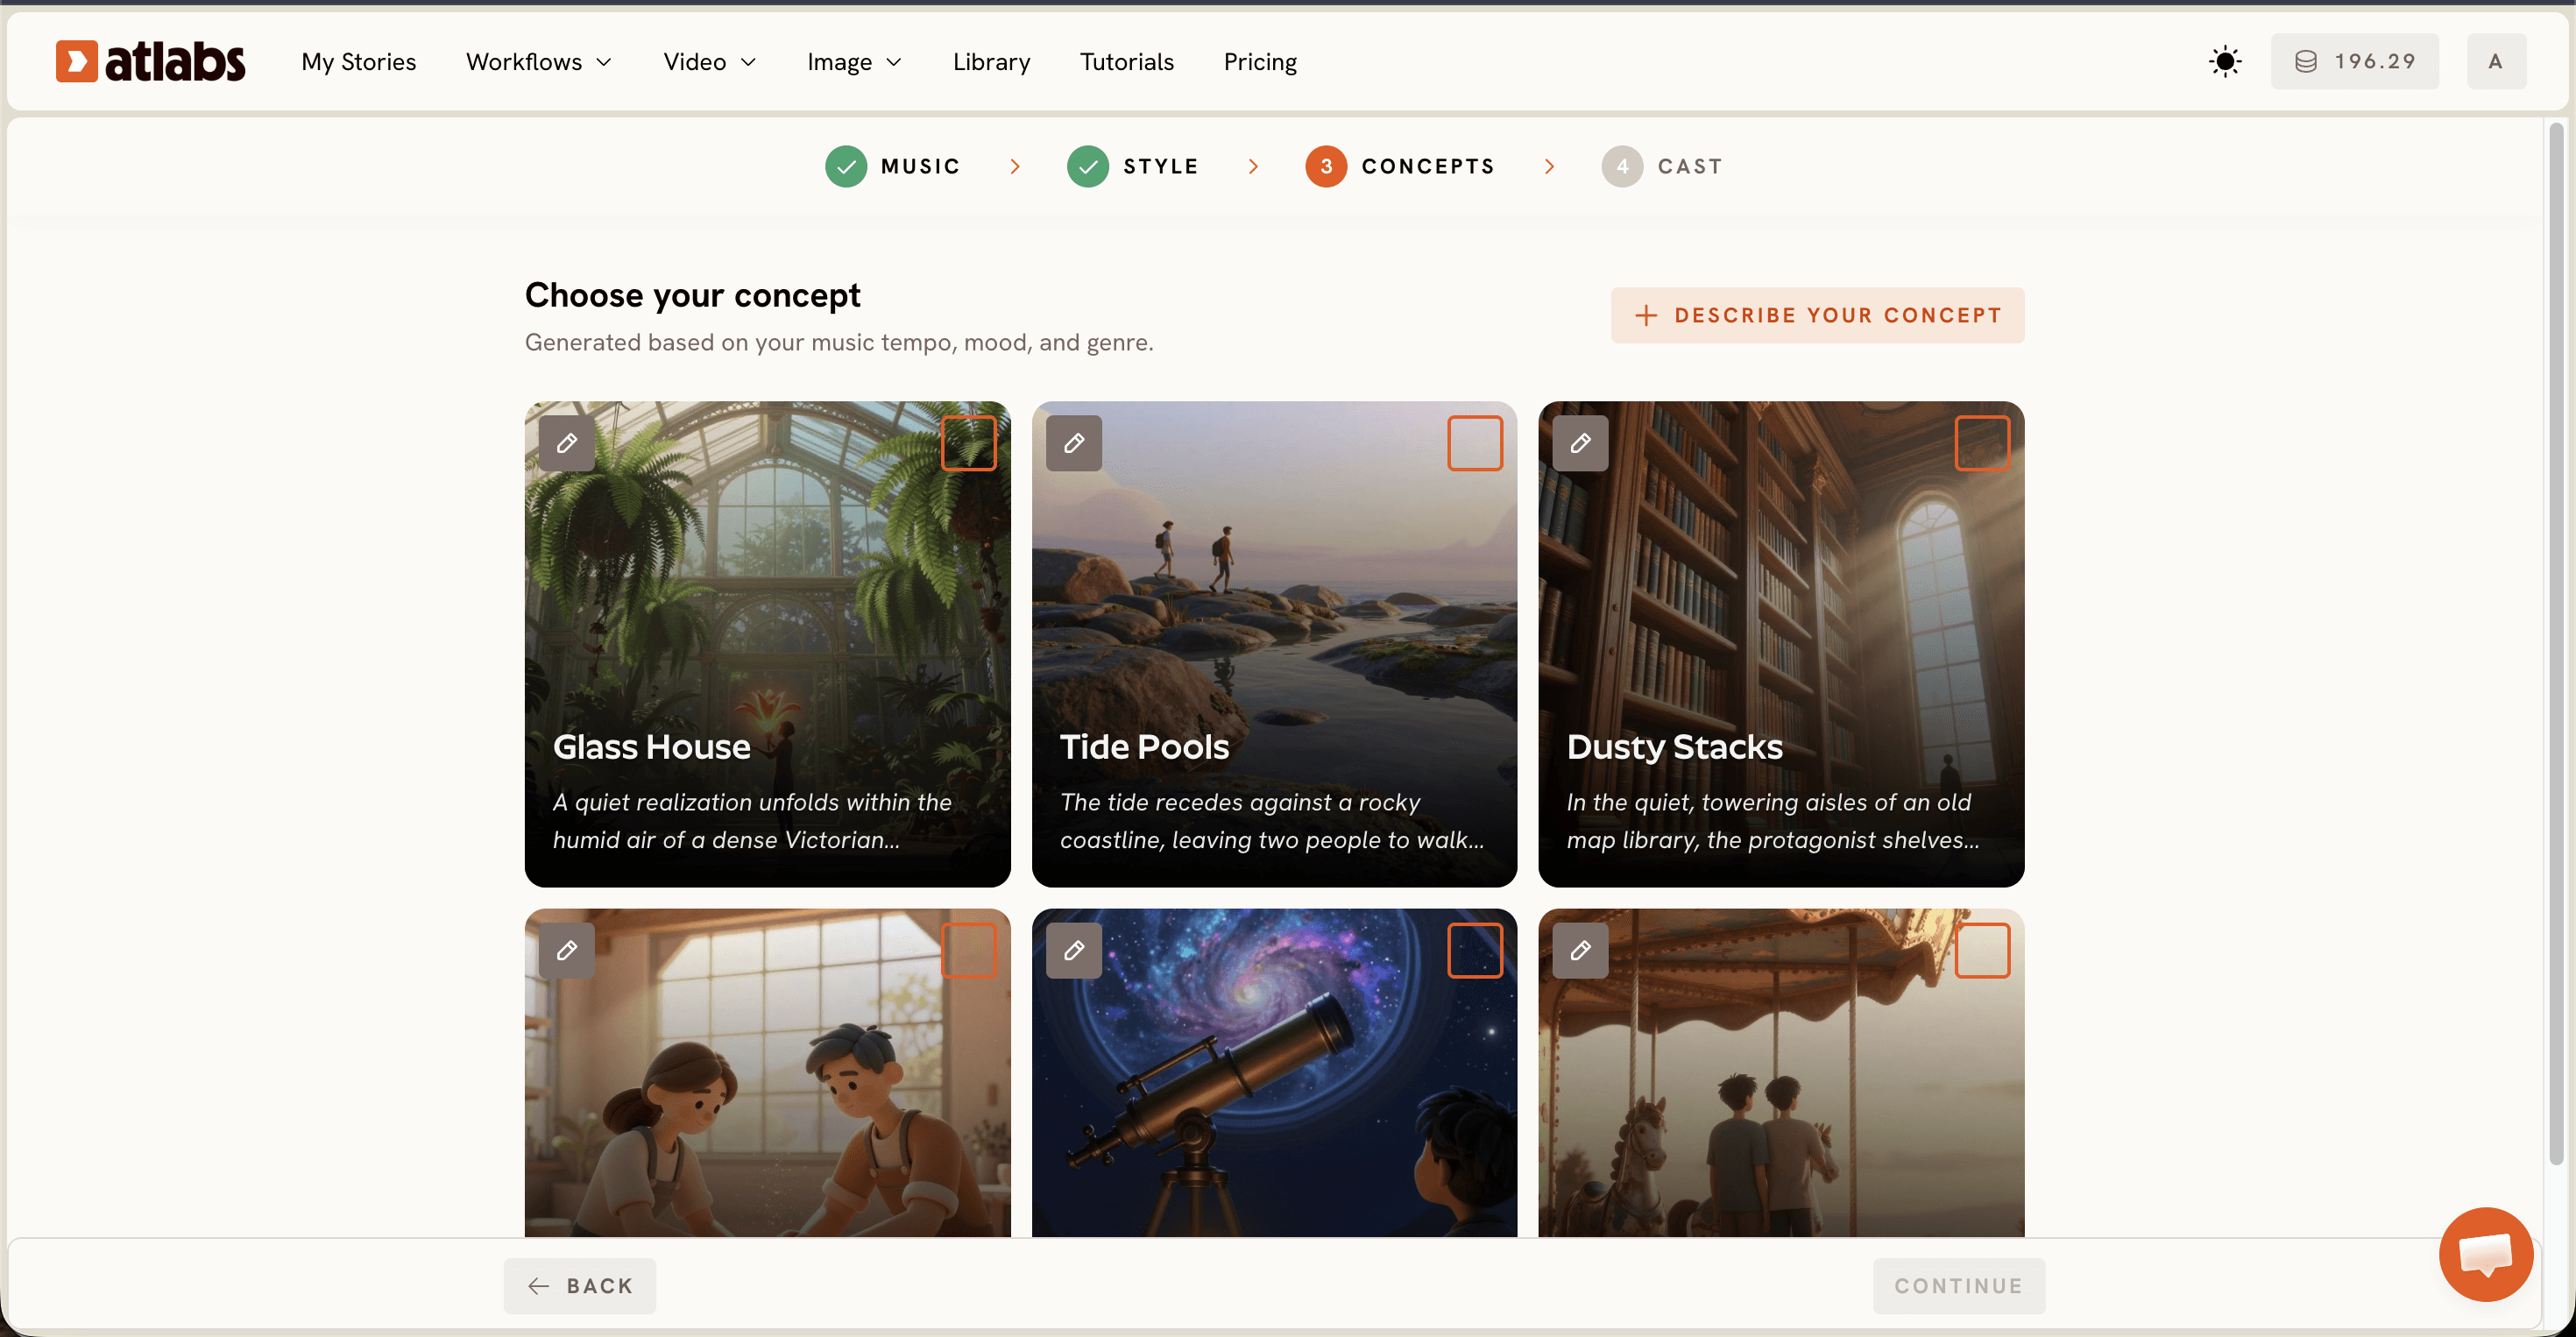
5. Write Concept Descriptions Like a Cinematographer
Atlabs generates six scene concepts based on your track's tempo, mood, and genre, but the Describe Your Concept option lets you write your own direction. Specific, sensory language outperforms vague language every time. Naming the time of day, the light source, the camera distance, and the texture of the setting gives the model something concrete to render instead of guessing at a generic scene.
6. Lock In Consistent Characters Through Cast
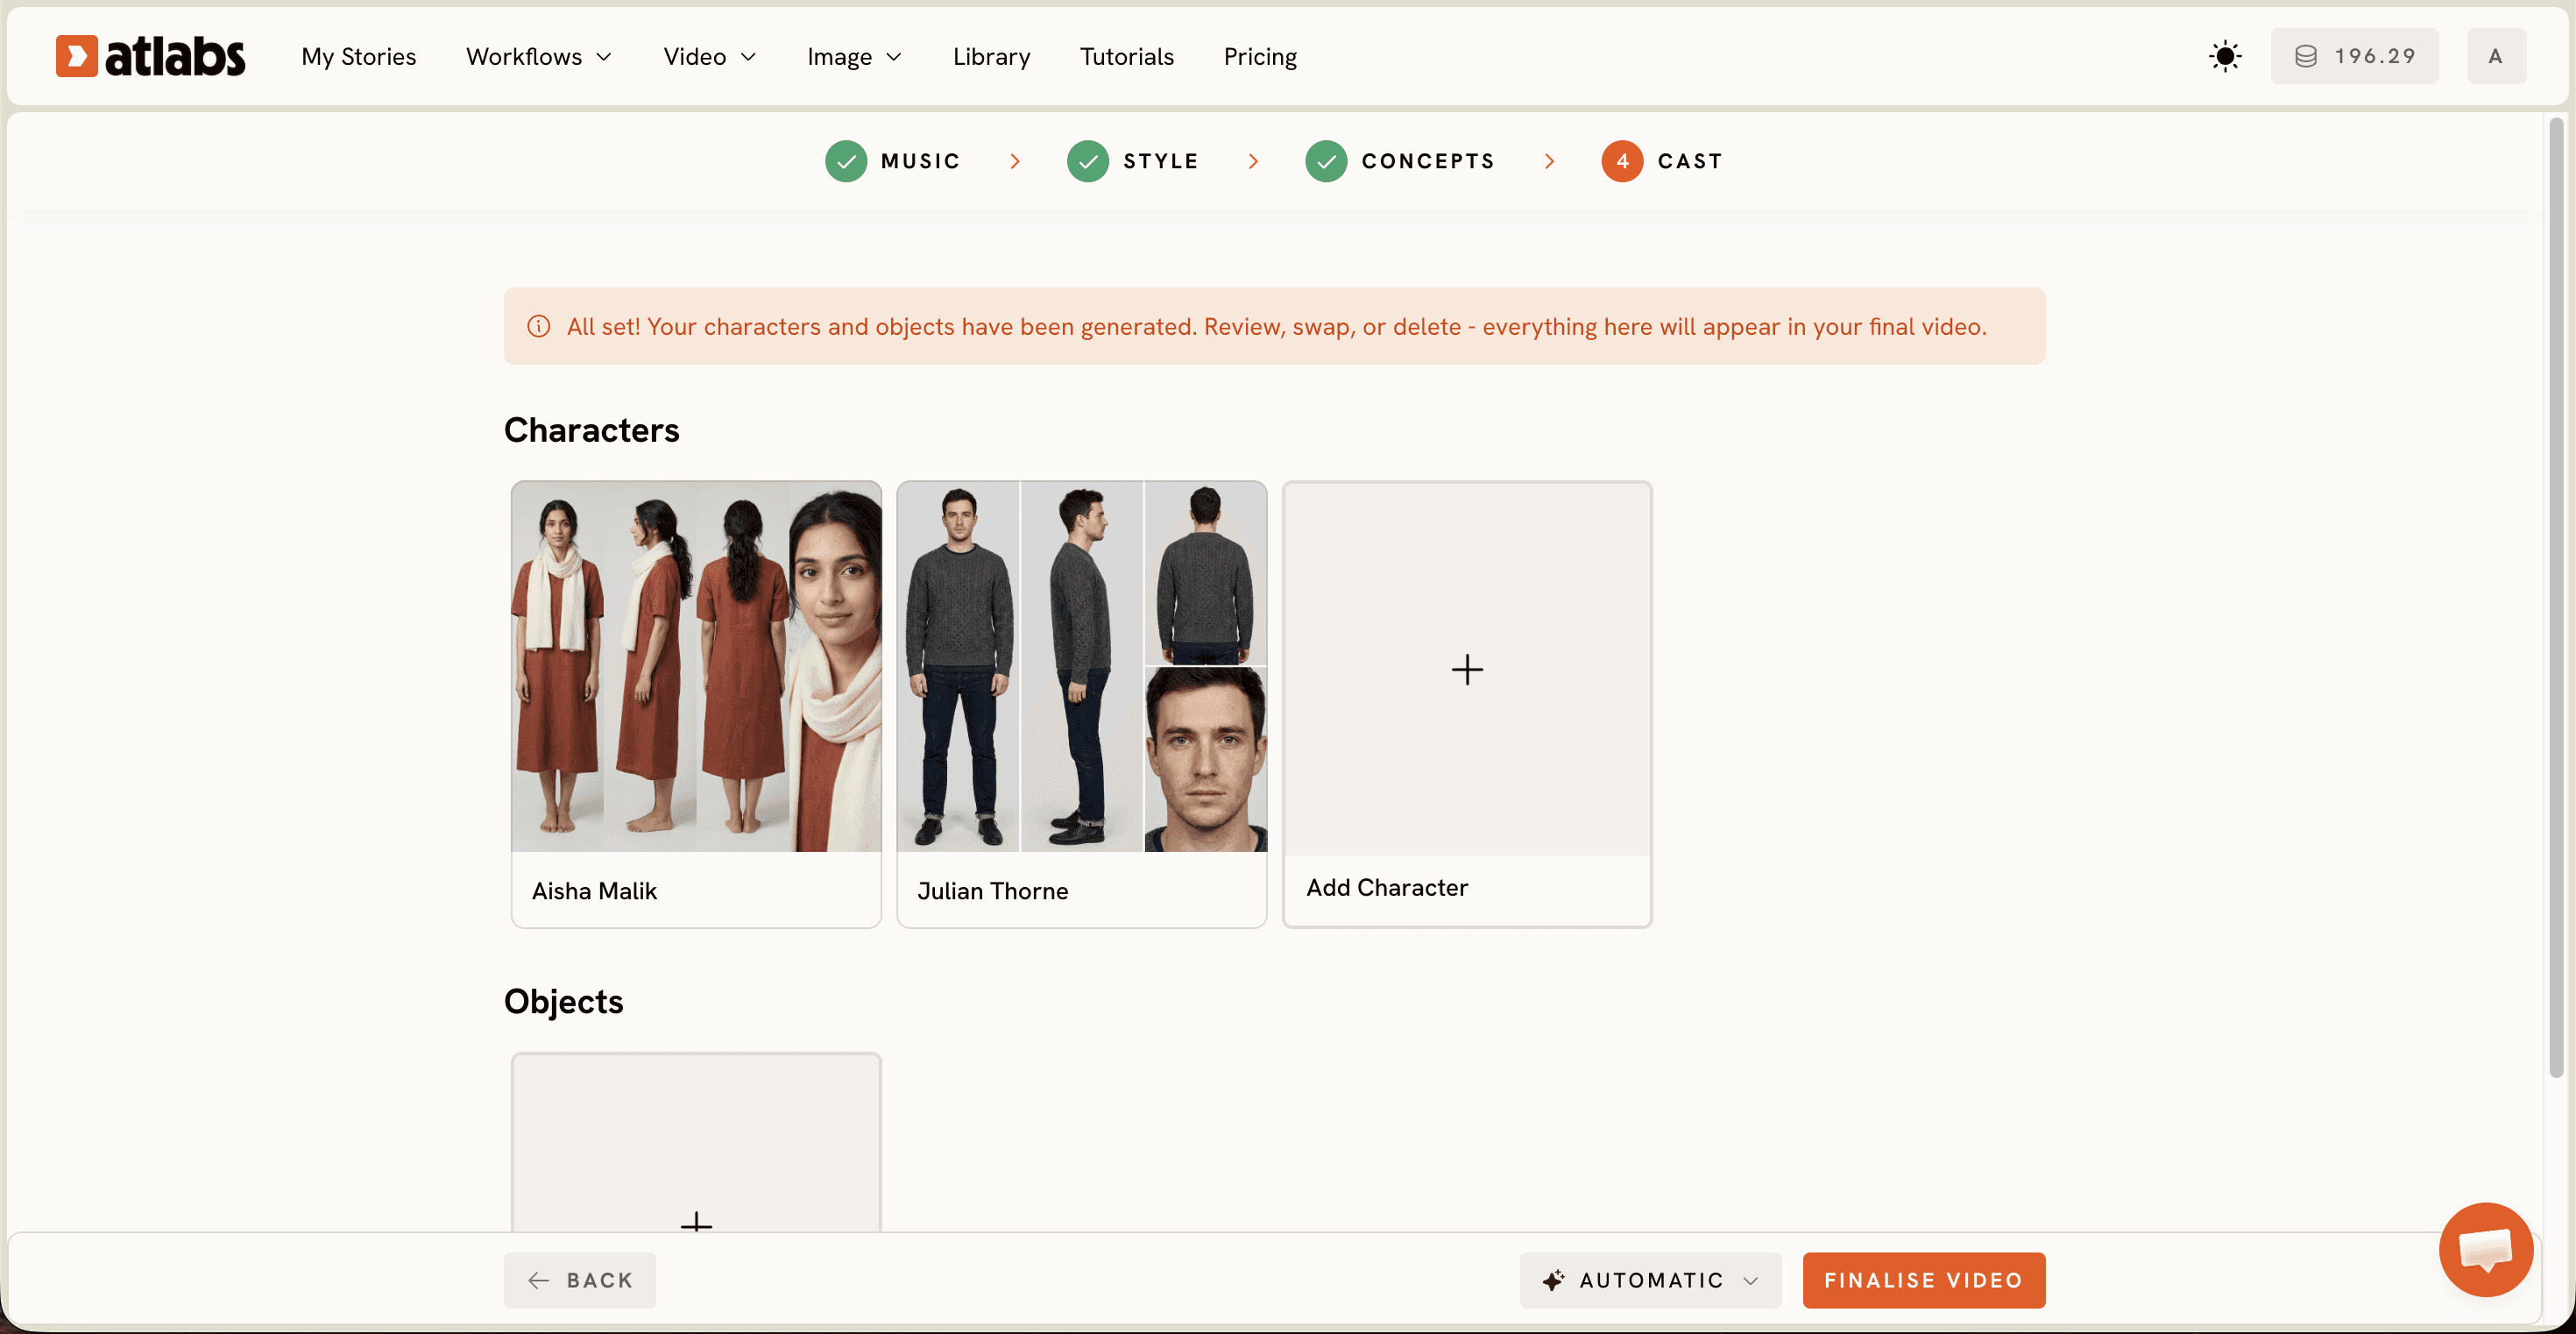
The Cast step generates a full reference sheet for each character, multiple angles plus a portrait, so the same face, build, and wardrobe carry across every scene. For an indie artist appearing in their own video, inconsistent characters are one of the fastest ways a video reads as artificial, since a viewer's eye catches a shifting face long before it catches a lighting error.
7. Sync Lips to Vocals for Natural Mouth Movement
If your concept includes a Performance video type with the artist singing on camera, run the clip through the Lip Sync workflow to match mouth movement to the actual vocal track. Mismatched lip movement is one of the clearest tells that a video was generated, even when every other frame in your indie music video looks convincing.
8. Get a Cinematic Look Without Animation
If the goal is realism, resist the pull toward stylized presets like Claymation, Paper Cutout, or Kawai Anime, even when they preview well. Those styles are built for a different audience entirely. Staying inside the Realistic style and photorealism focused models throughout the whole workflow is what keeps an indie artist's final cut looking like footage instead of an animated short.
9. Ground Choreography With Motion Control
For tracks with dancing or staged movement, Motion Control transfers motion from a reference video onto your character image, so the choreography reads as observed rather than invented. This is one of the more overlooked techniques for indie performance videos, since natural human movement is still hard for any model to invent from a text prompt alone.
10. Match Aspect Ratio to Platform Without Breaking the Frame
Set Style offers 9:16 for TikTok and Instagram, 16:9 for YouTube, and 1:1 for LinkedIn, Twitter, Facebook, and Pinterest. An indie artist releasing across platforms should pick the final aspect ratio before generating rather than cropping afterward, since cropping a finished realistic shot can cut off the framing that made it convincing in the first place.
11. Upscale Before You Call It Final
Run your finished export through the Upscale workflow to increase resolution before publishing. Soft, low resolution footage reads as artificial even when the underlying generation was strong, so this step closes the gap between a good draft and a finished, broadcast ready clip for your indie release.
12. Caption and Reframe for Each Platform
Once the core video is locked, use Caption Video to add captions for sound off viewing and Reframe if you need a second aspect ratio for a different platform. Doing this last, after the realistic look is already set, keeps every delivered version of your indie music video consistent instead of generating separate clips from scratch for each platform.
Watch the Full YouTube Tutorial
Tips for Better Results
A few extra habits separate a convincing clip from a merely decent one. Keep your concept prompts consistent in tone across all six scenes, since a jarring shift from a warm sunset description to a cold blue interior breaks the illusion even when each individual frame looks fine. Favor wide and medium shots over extreme close ups in early tests, since faces under heavy magnification are still where most models show their limits. Watch how your chosen model handles hands and reflective surfaces before committing to a full take, and regenerate any concept card that shows obvious distortion. An indie artist releasing more than one video should build a character reference sheet once and reuse it across tracks, since a familiar face across releases reads as a deliberate visual identity.
Example Concept Prompts You Can Copy
Two starting prompts to paste directly into Describe Your Concept. Adjust the details to match your own indie track's mood and genre.
A lone figure walks down a rain soaked city street at night, neon signs reflecting off wet pavement, handheld camera following from a low angle, warm orange streetlight against cool blue shadow, shallow depth of field on the figure's face.
Golden hour light across an empty desert highway, the artist sits on the hood of a parked car, wide establishing shot first then a slow push into a medium shot, dust drifting through the light, warm and slightly desaturated color grade.
FAQ
How long does it take to make a realistic AI music video?
Most indie artists finish a full pass through the Music Video workflow in ten to fifteen minutes, from uploading the track to picking concepts and casting characters. Generation time for the actual clips depends on length and model choice, but the workflow itself does not require editing experience.
What file types does the Music Video workflow accept?
Atlabs accepts mp3 files up to 200MB for Add Music, or a direct Suno link if your track lives there. There is no need to convert formats beforehand.
Do I need editing skills to make my AI video look realistic?
No. Every technique in this guide happens inside the Music Video workflow itself, from style selection to casting to upscaling. The skill that matters most for an indie artist is writing specific, sensory concept descriptions rather than vague ones.
Why does my AI video still look animated even with the Realistic style selected?
This usually traces back to model choice, vague concept prompts, or inconsistent characters across scenes. Revisit techniques two, five, and six above, since model selection, prompt specificity, and character consistency account for most of the gap between a flat looking clip and a convincing one.
Get started
Open the Music Video workflow and run your own indie track through these twelve techniques.